Table of Contents
Introduction of CI/CD Pipeline:-
- In the continuous integration and continuous deployment process, we need to build our source code and deploy it in that target environment.
- We are going to use the Java project in this project.
- That code is already available in our GitHub account and we need to set up Jenkins as well as maven.
- Once this is done, we need to integrate GitHub with Jenkins and Maven with Jenkins so that
- we can pull the code onto Jenkins and build with the help of Maven.
- And if we need any changes to our source code, we will do with the help of Git from our local workstation station
- Then we will commit that code onto GitHub.
- That is what we are going to do in this Module-2.
- So far, we have Git and GitHub.
Now we need to set up Jenkins and Maven for us to let us go and set up the Jenkins server.

Setup Jenkins Server:-
We will follow the below steps to set up our Jenkins server-
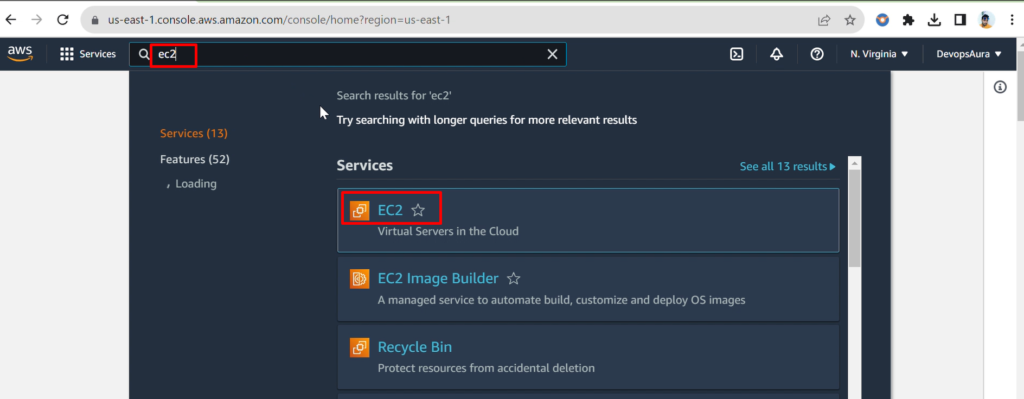
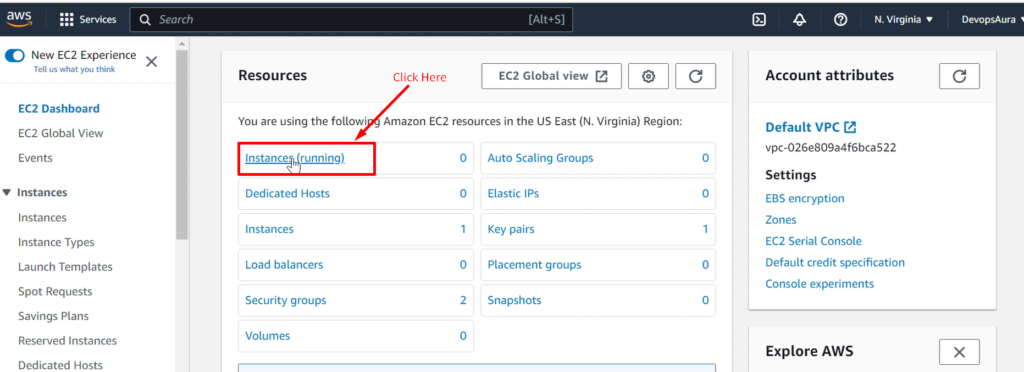
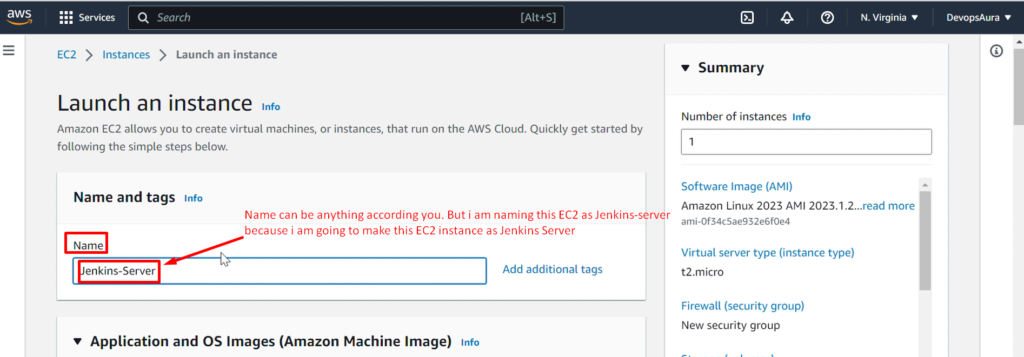
Step 1:- Setup a Linux EC2 Instance on AWS
Step 2:-Install Java =Jenkins is a Java-based application which is the reason we have to install Java
Step 3:-install Jenkins
Step 4:-Start Jenkins
Step 5:-Access Web UI on Port no 8080
Step 1:- How to launch and set up an EC2 instance on AWS?
I am attaching screanshots which guids you how to launch and set up EC2 instances step by step.

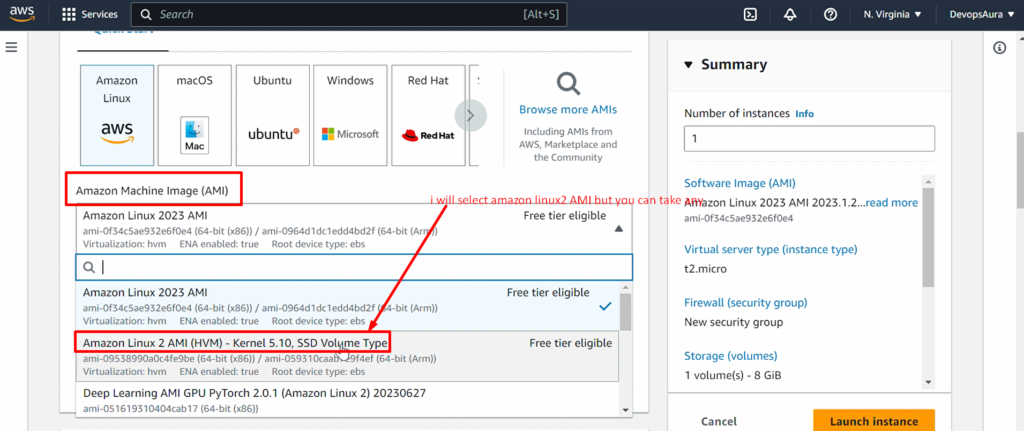
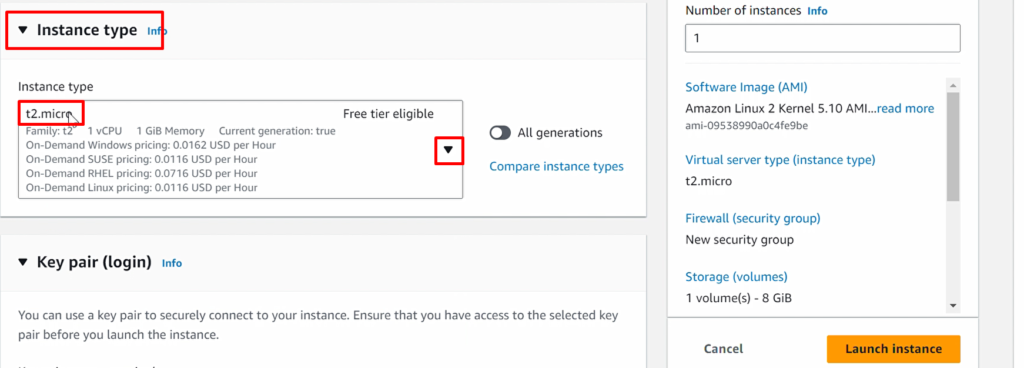
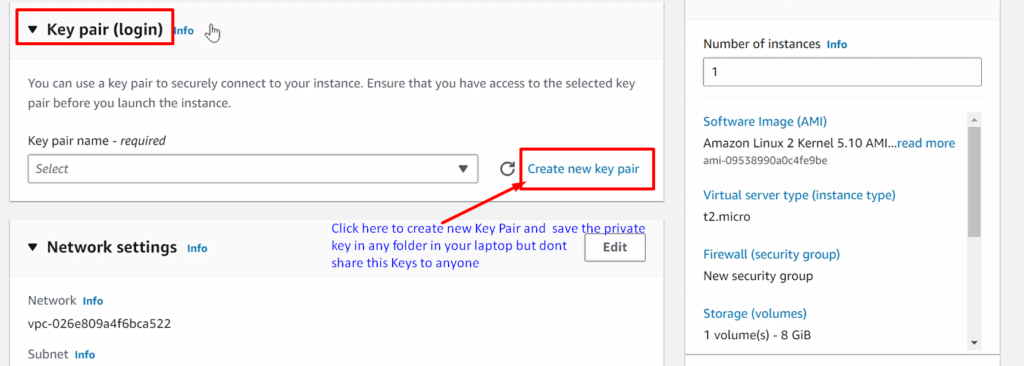


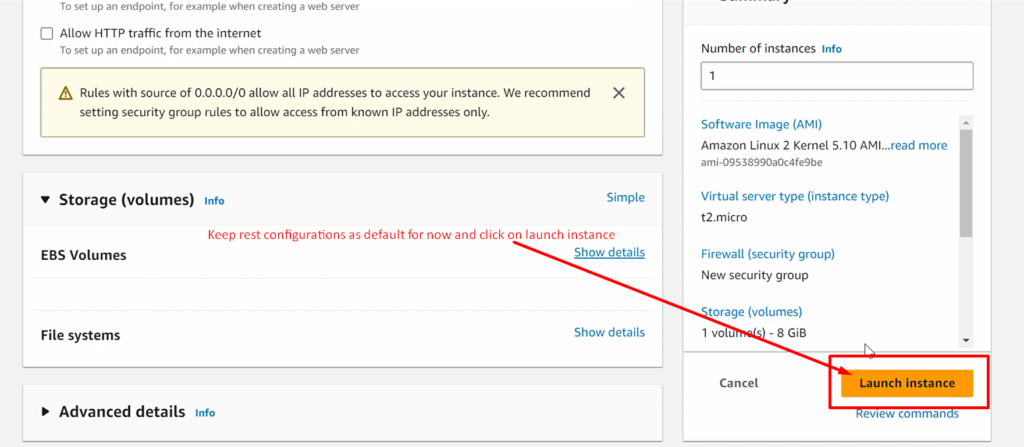

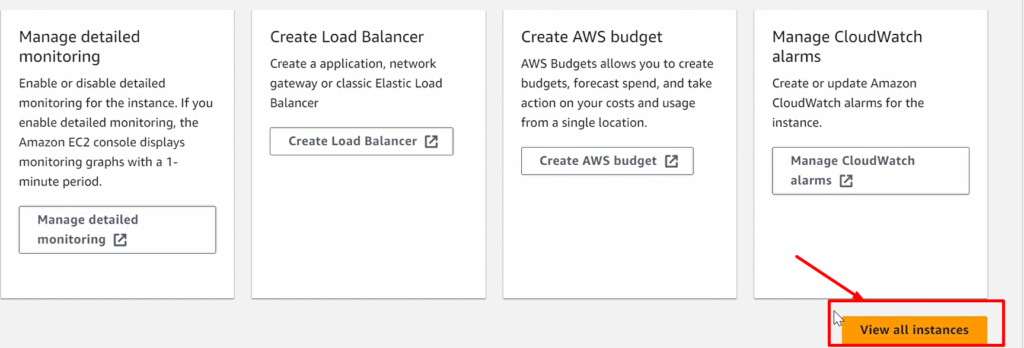

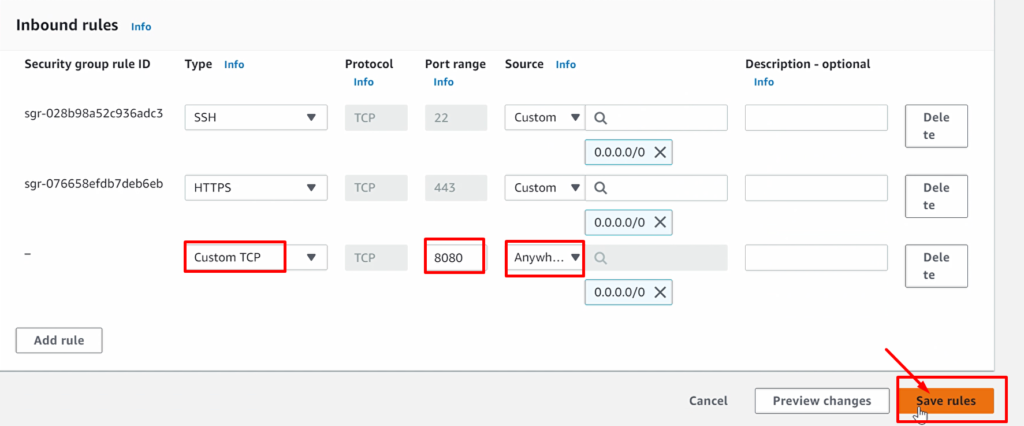
- Now I will edit the security group of this instance and add an inbound rule on port number 8080 so that we can access Jenkins UI
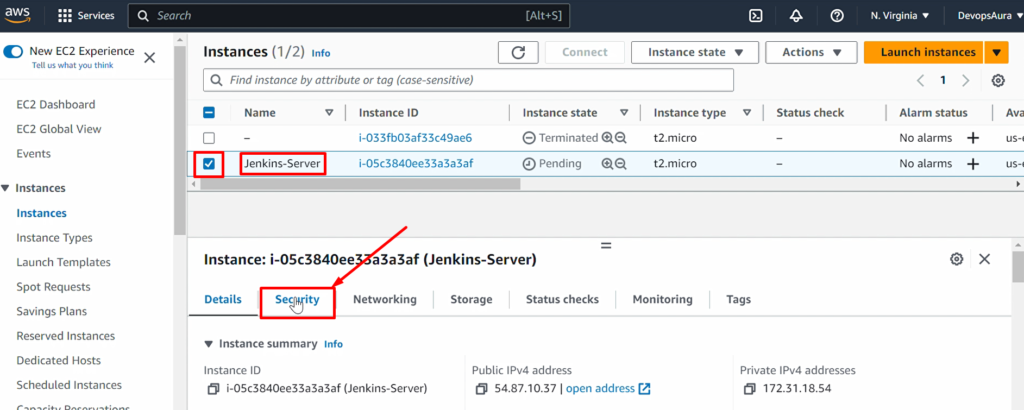

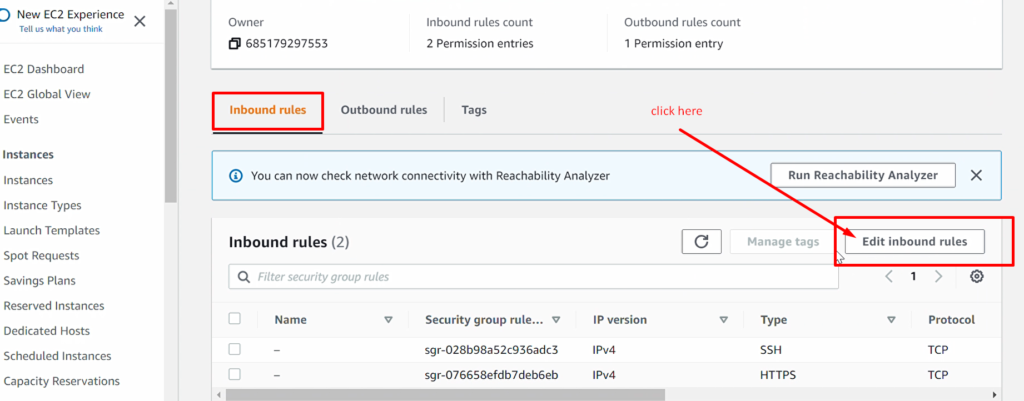
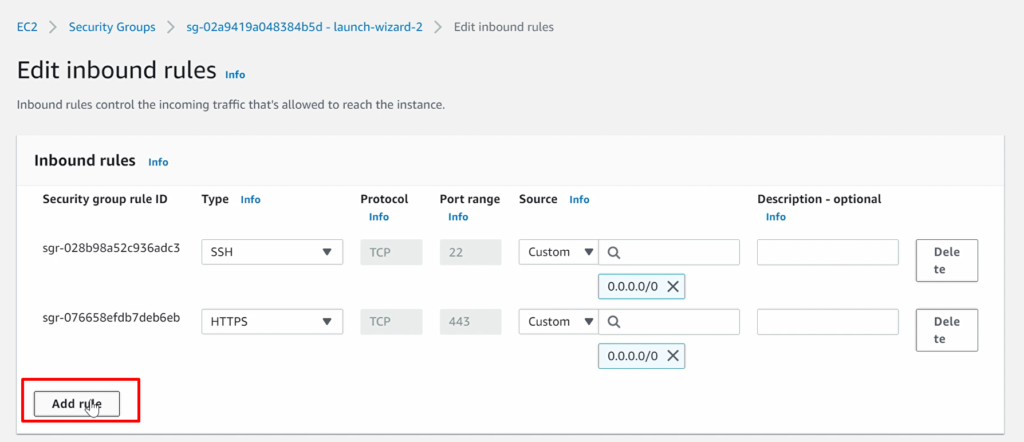
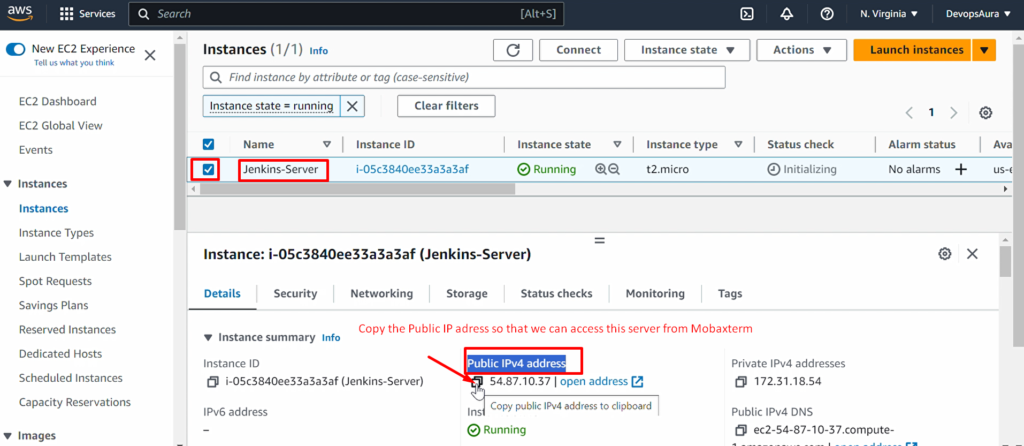
Now we will access this EC2 (Jenkins Server) with the help of the Mobaxterm tool:-
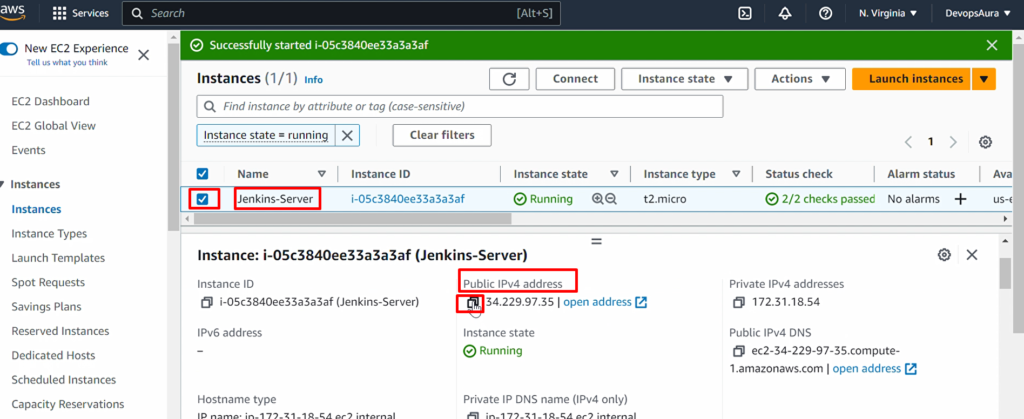
First we need to copy public Ip adress of EC2 instance as below
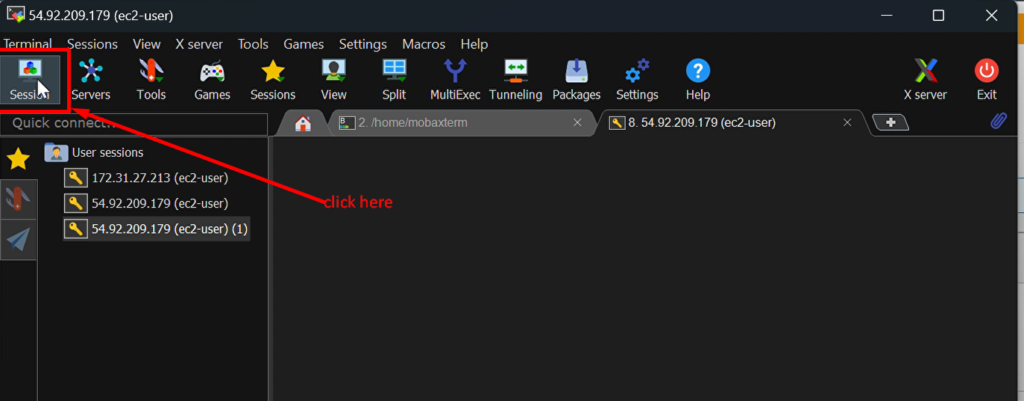
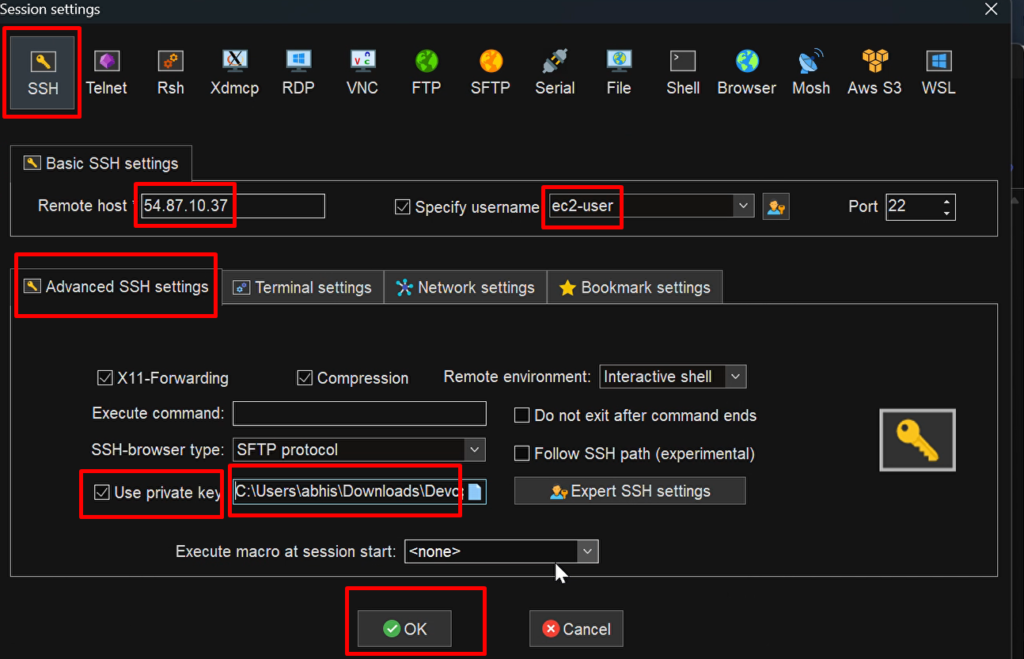
Now go to Mobaxterm terminal to access EC2( but if you are using Mac then you can use your terminal directly)
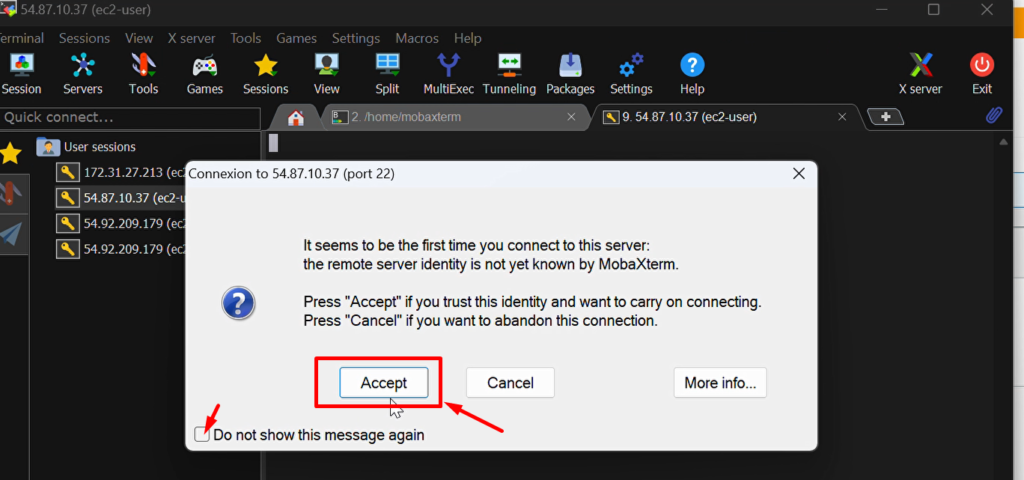
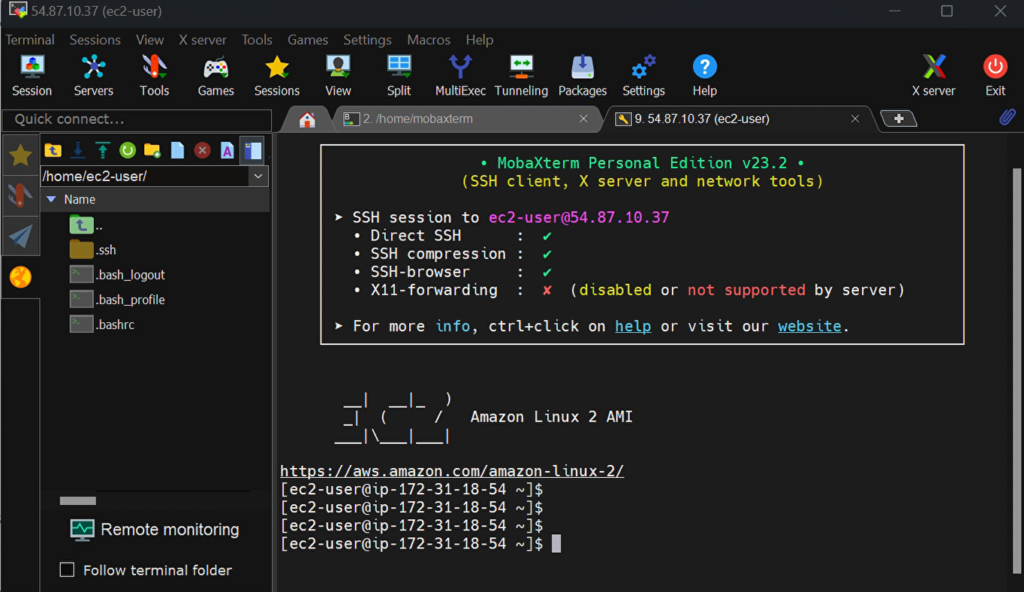
Step 2:-How to install Java into the EC2 instance?
- Since Jenkins is a Java-based tool and Jenkins supports Java so first we have to install Java first.
- So login EC2 instance as the root user and then install Java as the below screenshots
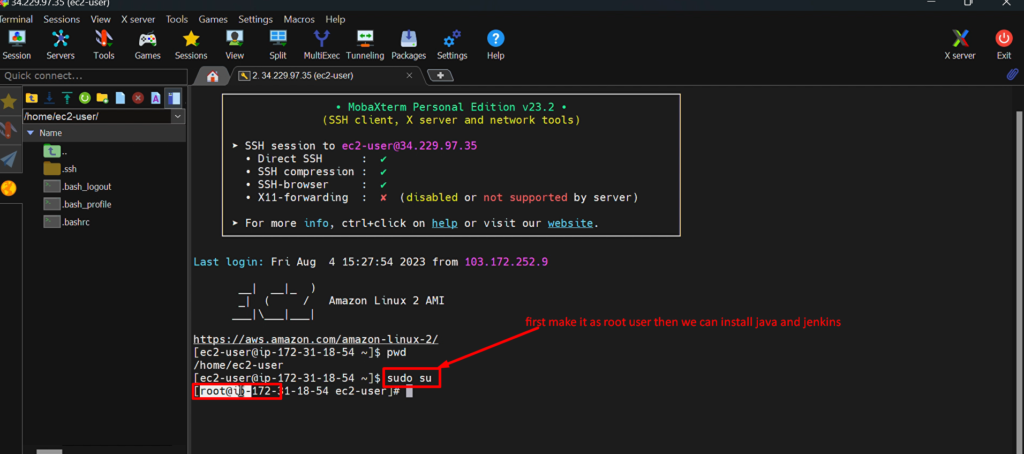
Now we will run below command to install java in EC2 instance so that we can install jenkins further
					sudo wget -O /etc/yum.repos.d/jenkins.repo https://pkg.jenkins.io/redhat-stable/jenkins.repo
sudo rpm --import https://pkg.jenkins.io/redhat-stable/jenkins.io-2023.key
yum install fontconfig java-11-openjdk
yum install jenkins
Java -version
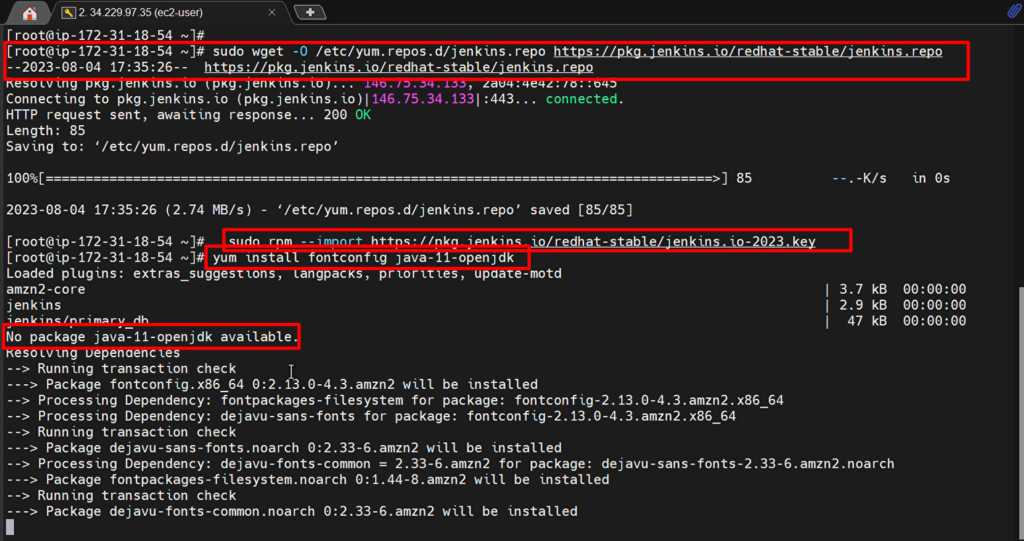
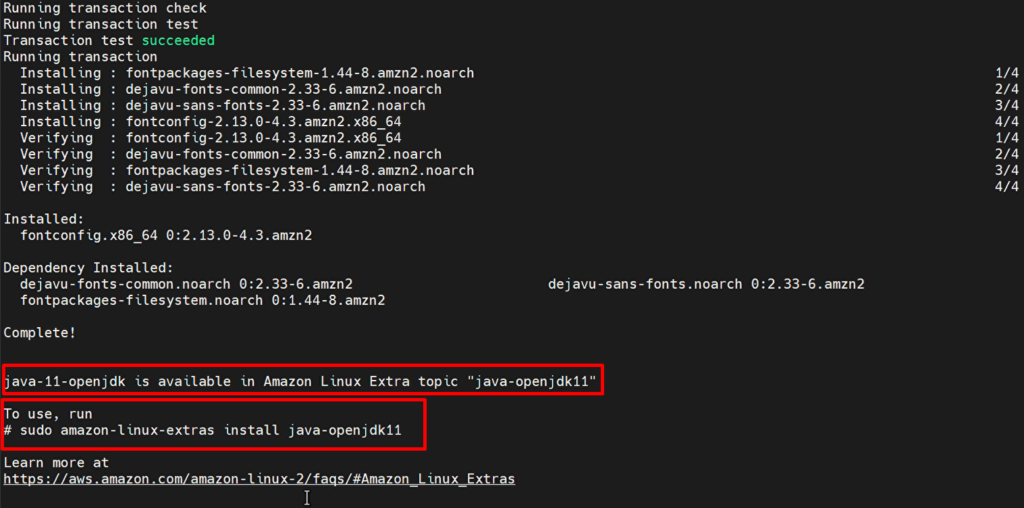
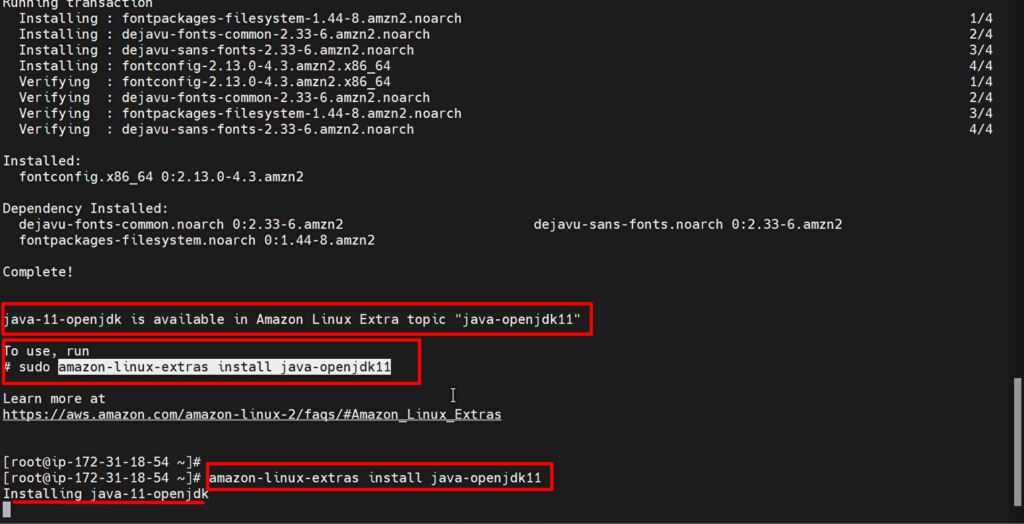
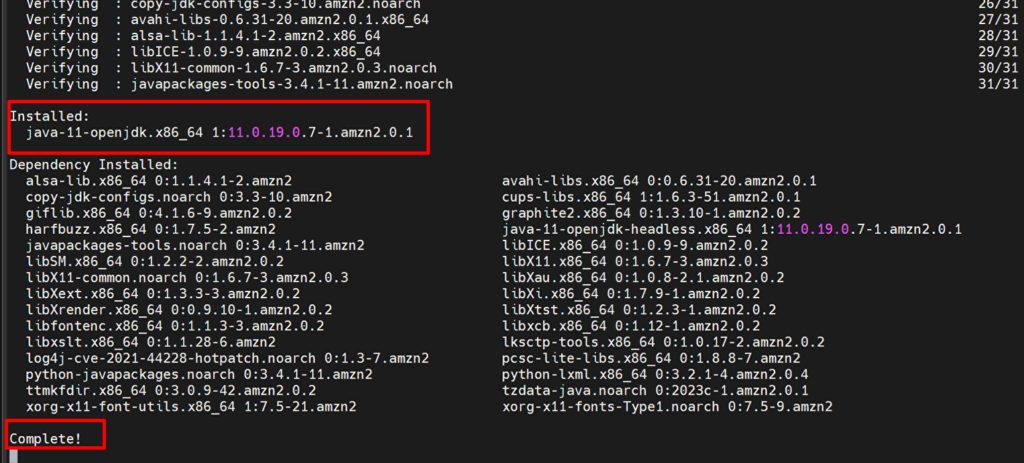
Now you can see above that Java has been installed successfully
For reference document for step 2, please click here
STEP 3:- how to install Jenkins in an EC2 instance?
- As we have installed Java in previous step 2, Now we are ready to install Jenkins into EC2
- To install Jenkins onto EC2 instance we need to run below command
yum install jenkins
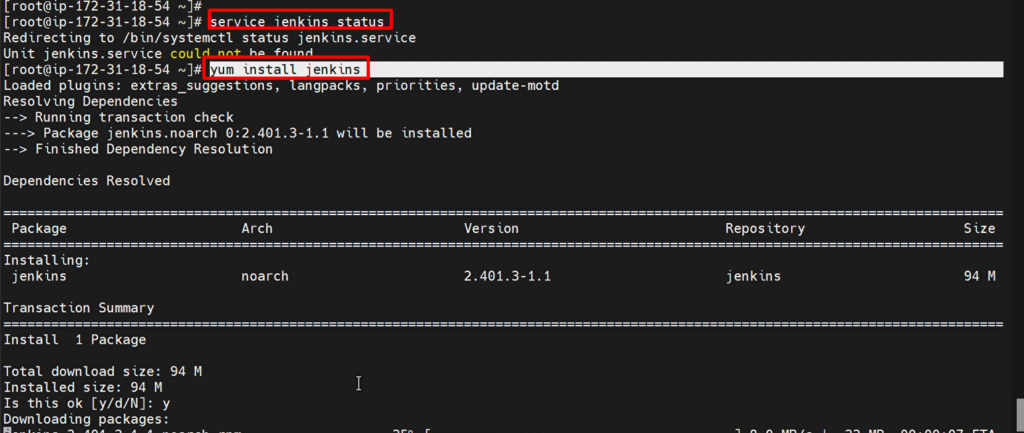
Step 4:- How to start Jenkins? And How to check Jenkins running status?
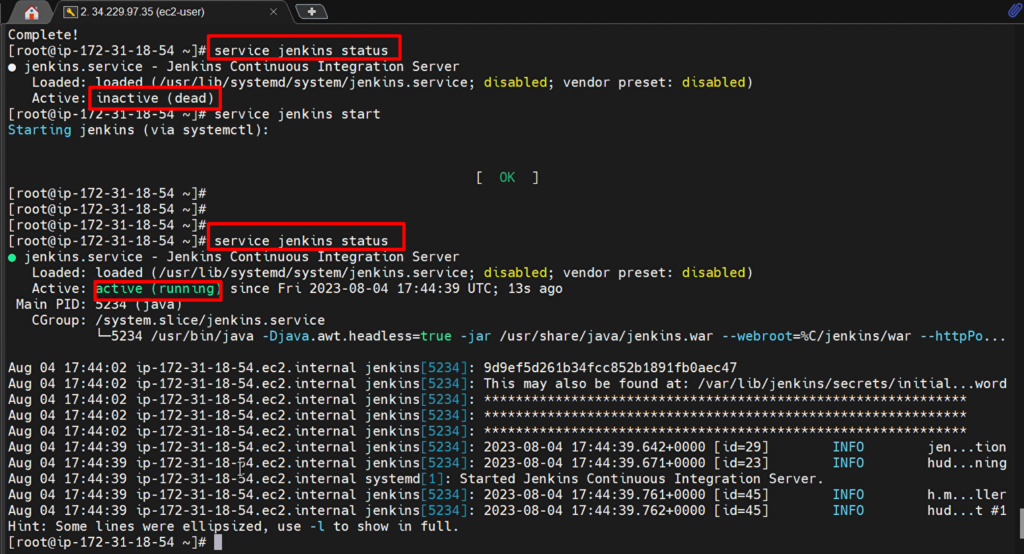
After installing Jenkins, we will start the Jenkins and then check the Jenkins status with the help of the below commands
					service jenkins start
service jenkins status
systemctl enable jenkins
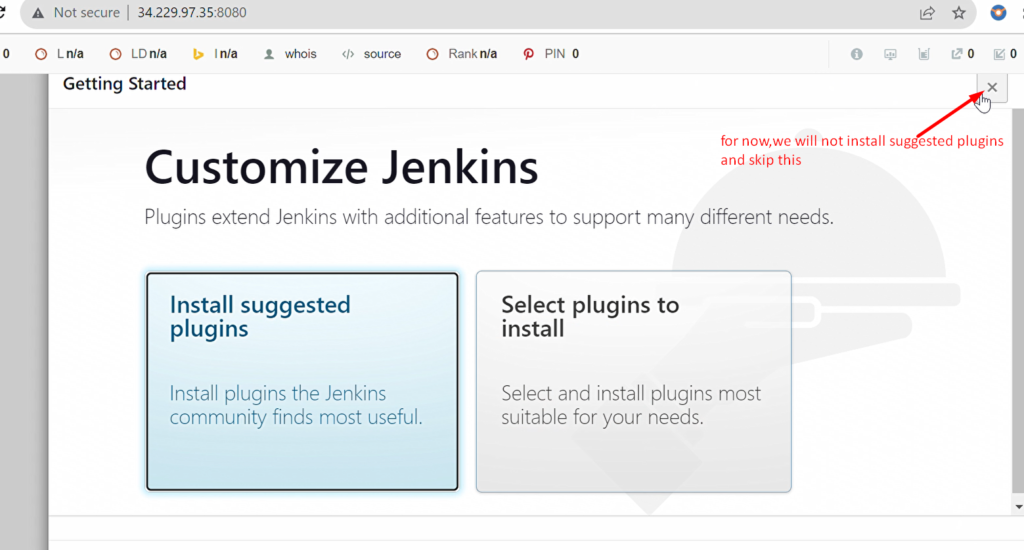
Step 5:- How to access the Jenkins server web UI?
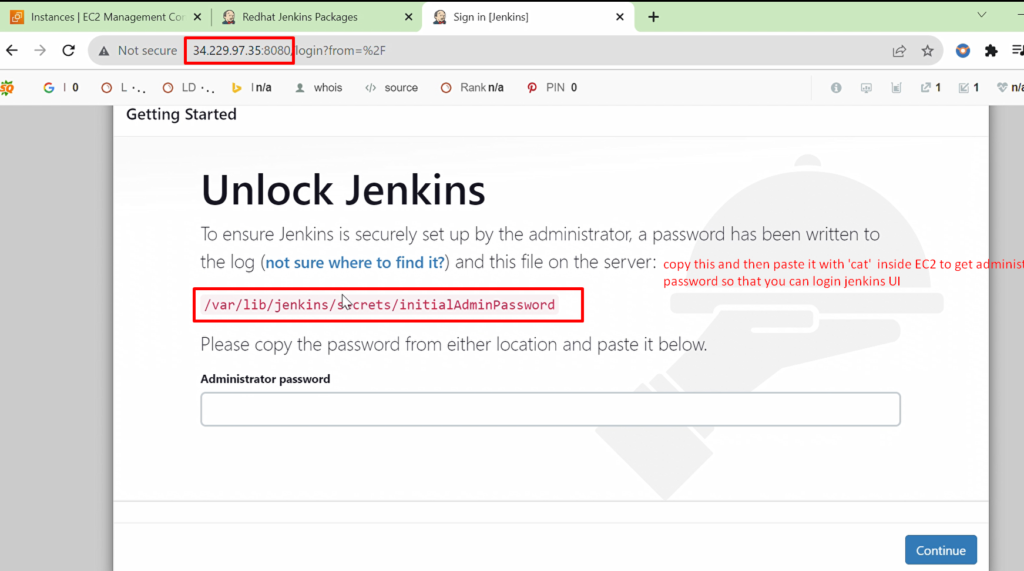
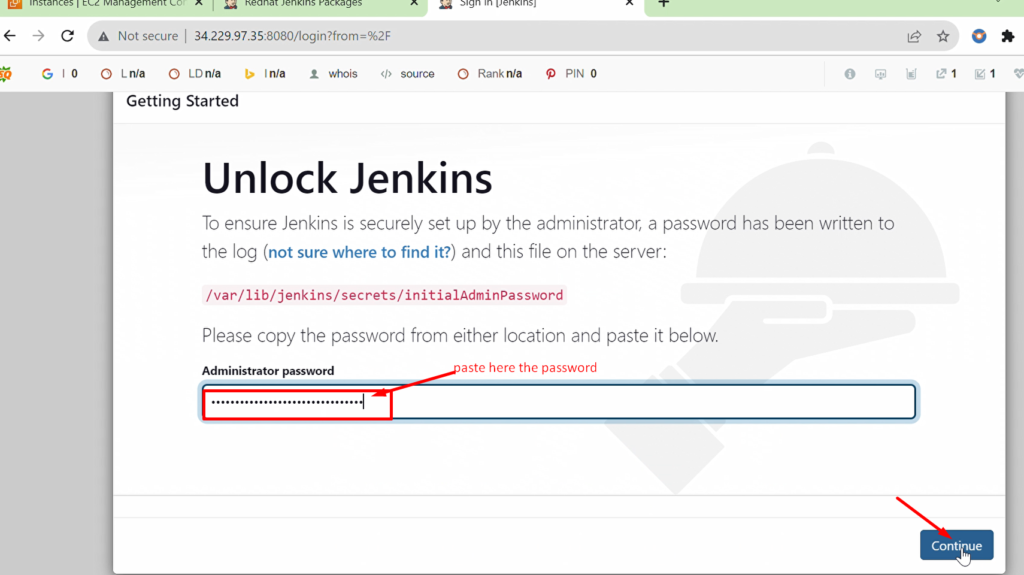
First, copy the public Ip address from the EC2 instance and then search for the ip address with port number 8080 in any browser as below


How to change the default admin password?
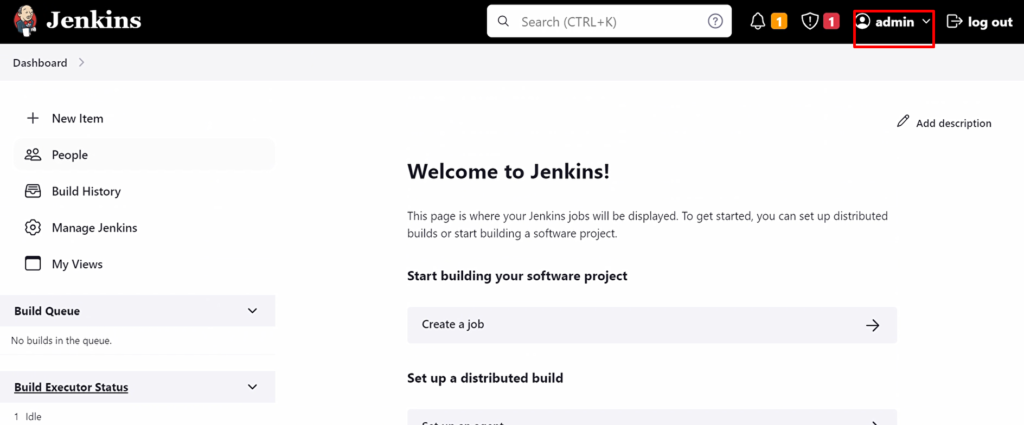
- Just click on your Profile (admin) and remove the password and put your password in whatever you want to use next time Jenkins login.
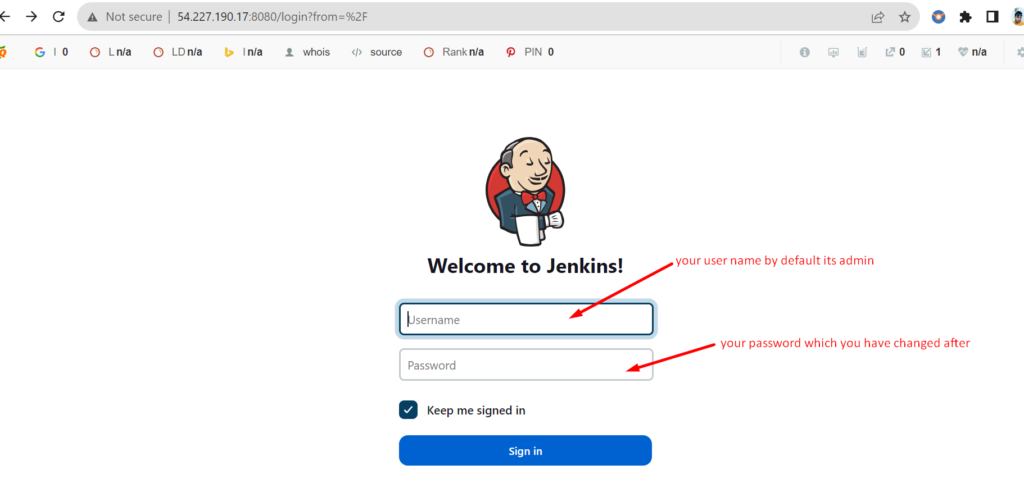
- By default, the username is ‘admin’.
Video Recording
How to Run Our Jenkins Job?
Now I will tell you how to create our first Jenkins job to build.
Step 1:- First log-in Jenkins dashboard from the browser
NOTE1:- if you had restarted/rebooted/stopped your EC2 instance(Jenkins server) then you have to again start your Jenkins service with cmd “service Jenkins start” .
NOTE2:- Remember always, after stopping/restarting EC2 instances, Public IP also will be changed so no need to take worry if you see different public IP.
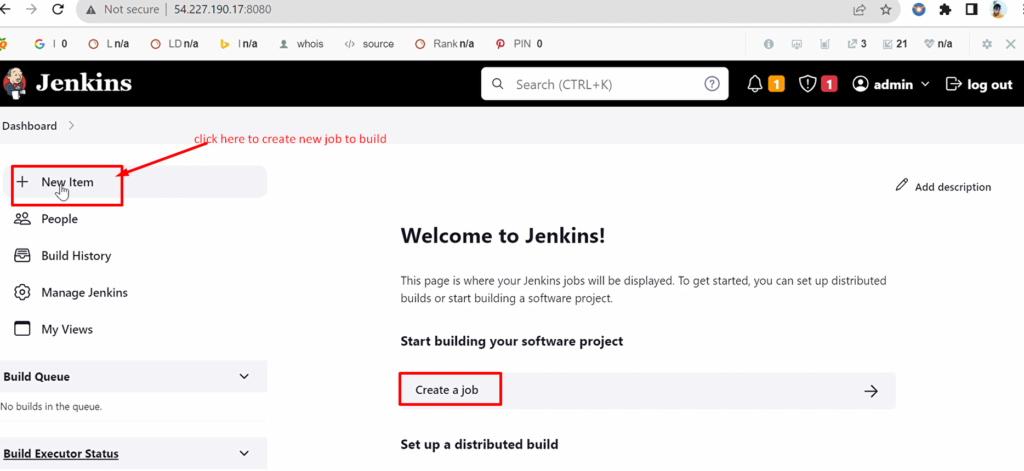
Step 2:- Now create job to build
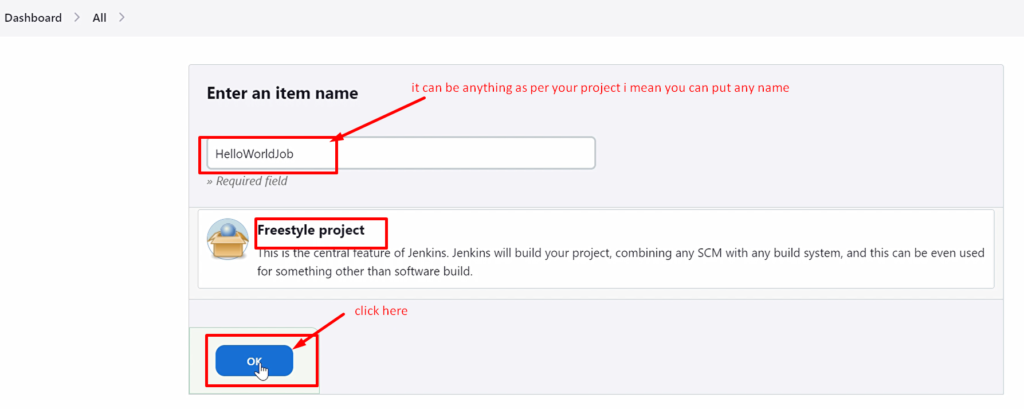
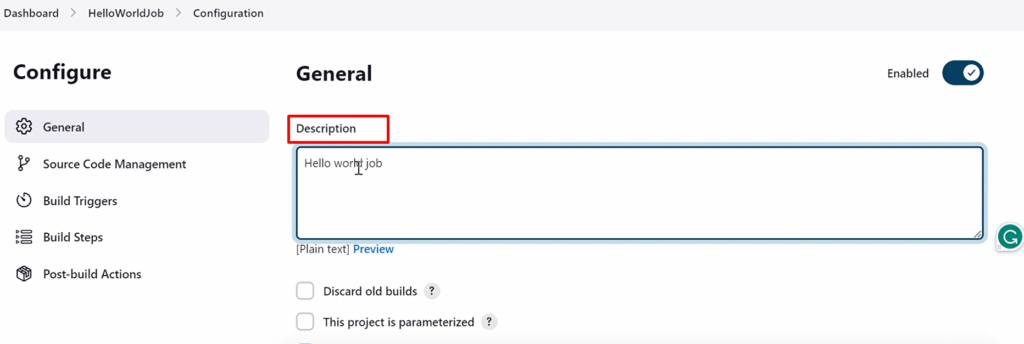

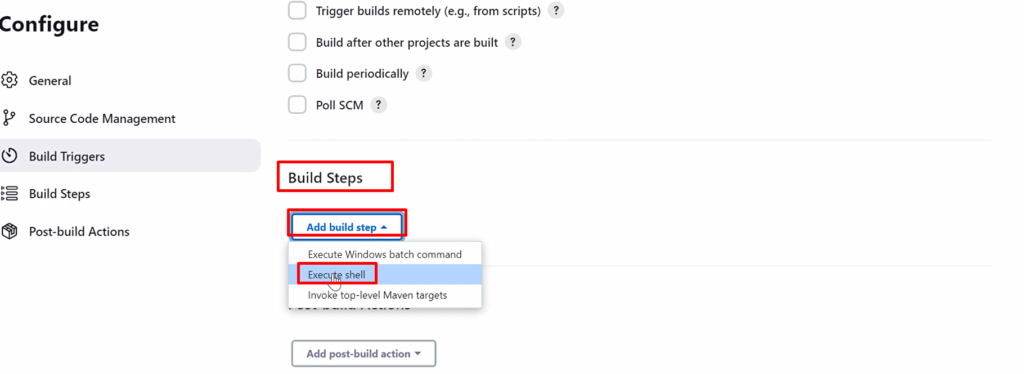
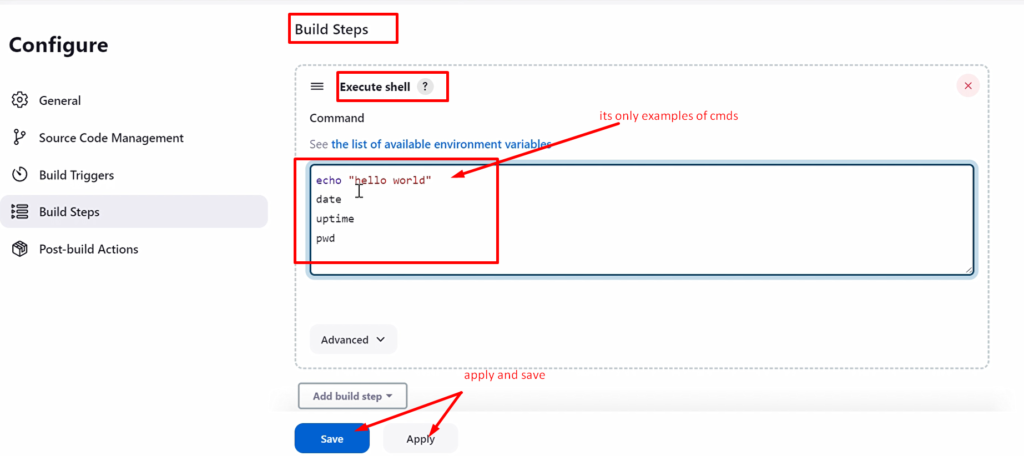
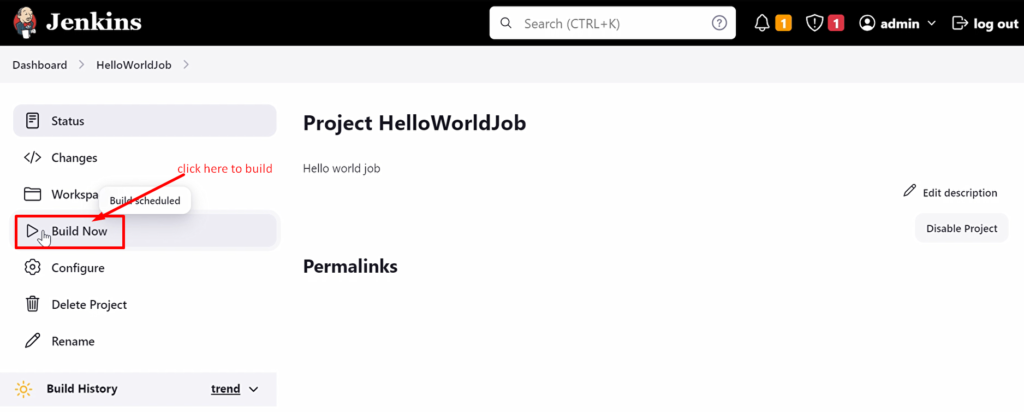
Step 3:- After creating the freestyle pipeline job, you need to build that job now
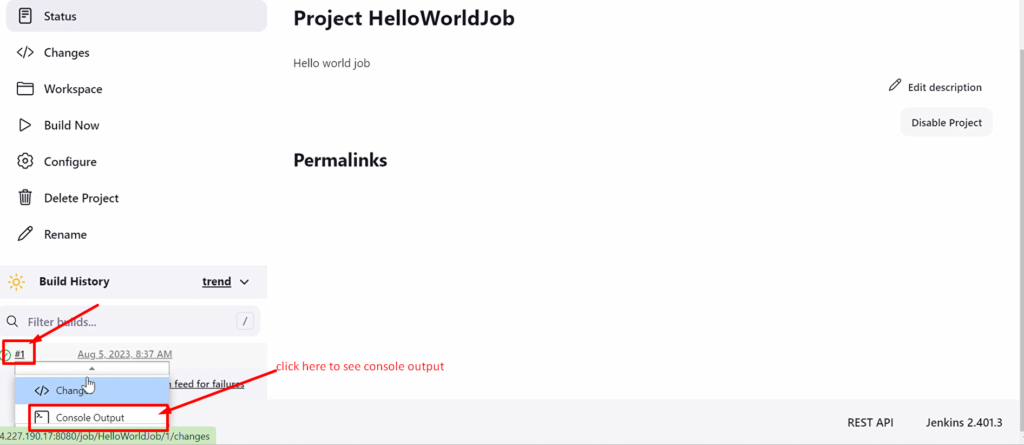
Now you can check the build status from the consol output as below screenshot
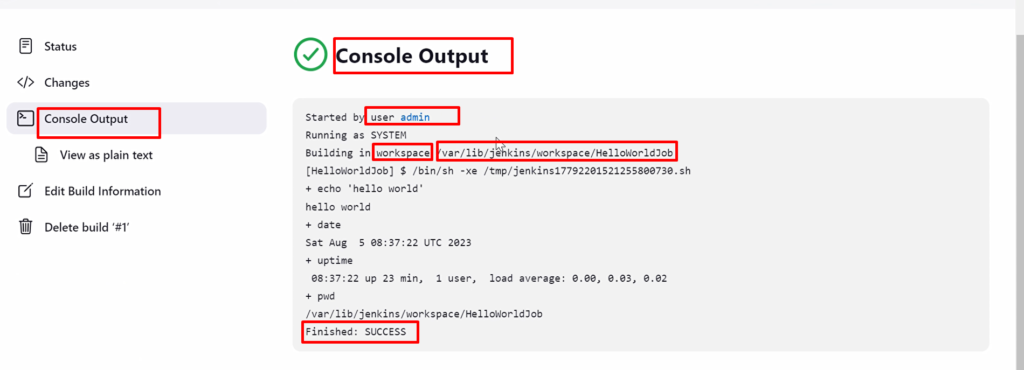
Now Jenkins first job is successfully created and build successfully
Video:-
If you have any doubt about any step of “how to run Jenkins job” or are stuck any step, please go through this video, which will help you understand and clear your doubt.
How to Integrate Git with Jenkins:-
- So far, we have installed Jenkins. And our source code is on GitHub( https://github.com/abhishek0400/hello-world).
- As whenever we pull the source code from GitHub into our local system(Laptop), we should have Git in our local system(laptop).
- Similarly, to pull the code from GitHub into Jenkins, we should have git in Jenkins, so we have to install git in Jenkins as well.
To integrate Github to Jenkins, we will follow below steps:-
Step 1:- Install Git on Jenkins Instance.

Step 2:- Install the GitHub plugin on Jenkins GUI.

Step 3:- Configure Git on Jenkins GUI.
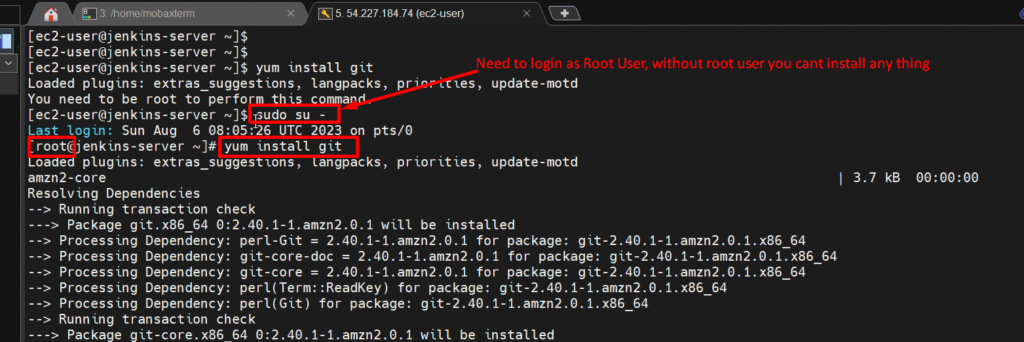
Step 1:- Install Git on Jenkins Instance.
please run below command before installing Git
					sudo su -
hostname jenkins-server
To install git in the system, please run the below command
yum install git
To verify or check the version of git
git –version

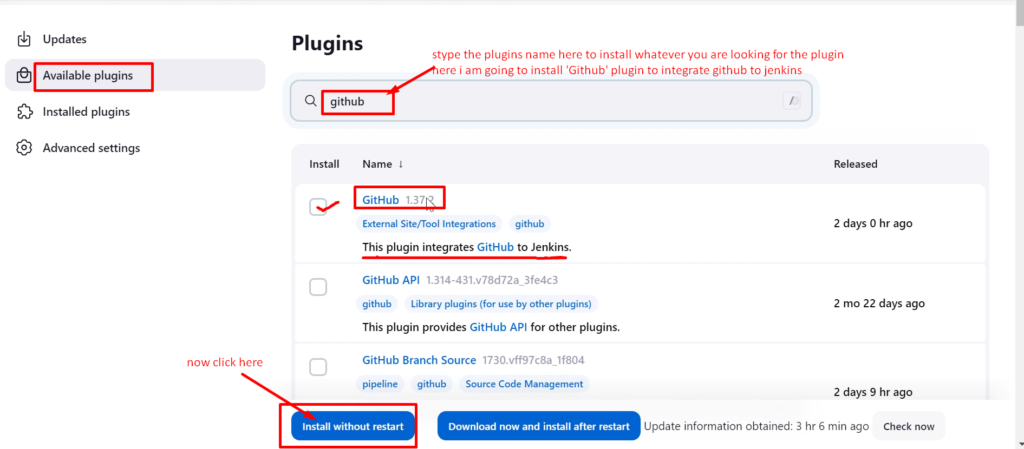
Step 2:- Install the GitHub plugin in Jenkins
now we need to install the GitHub plugin in Jenkins.
For that please follow the below navigate
Dashboard > Manage Jenkins > Manage plugins > Available > search Github > install without restart


Step 3:- Need to configure Jenkins
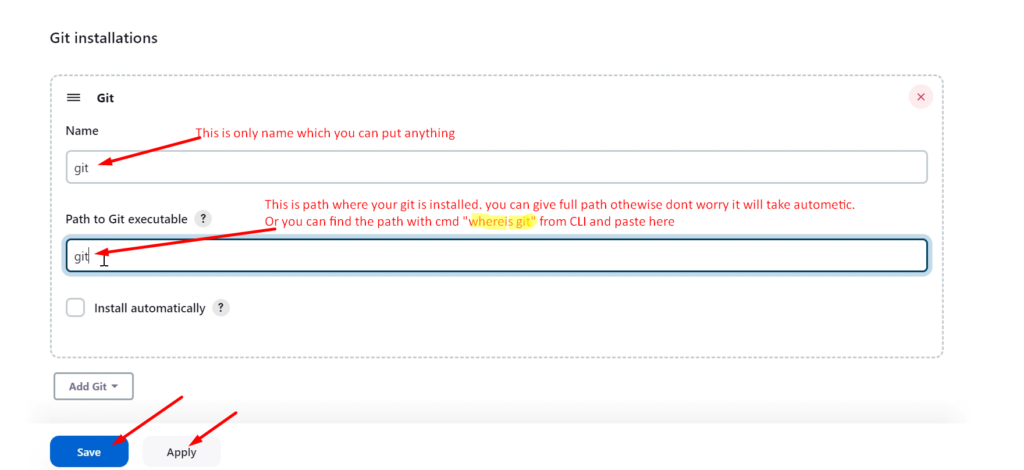
Now we need to configure jenkins.
For that please follow the below Navigate
Dashboard > Manage Jenkins > tools



Video Recording:CI/CD pipeline-
Please go through this video if you are stuck in any steps
Pull The Code From Gihub To Jenkins
Now we will learn How to Create a Jenkins job to pull the code from GitHub. And then we will build that source code.
We have already covered how to link(integrate) GitHub with Jenkins in a prior step, and this will be brought up again.
We will now create a fresh Jenkins job to pull the code from GitHub.
You can access my code on GitHub.https://github.com/abhishek0400/hello-world
We will follow the below steps to pull the code from GitHub
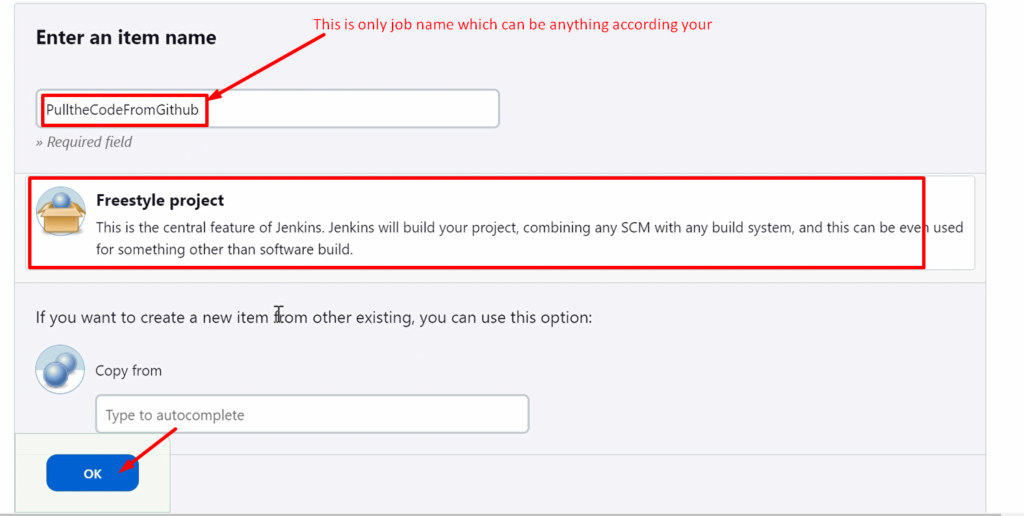
Step 1: create a new fresh job to pull the code

Step 2: And then run(build) that job to pull the source code

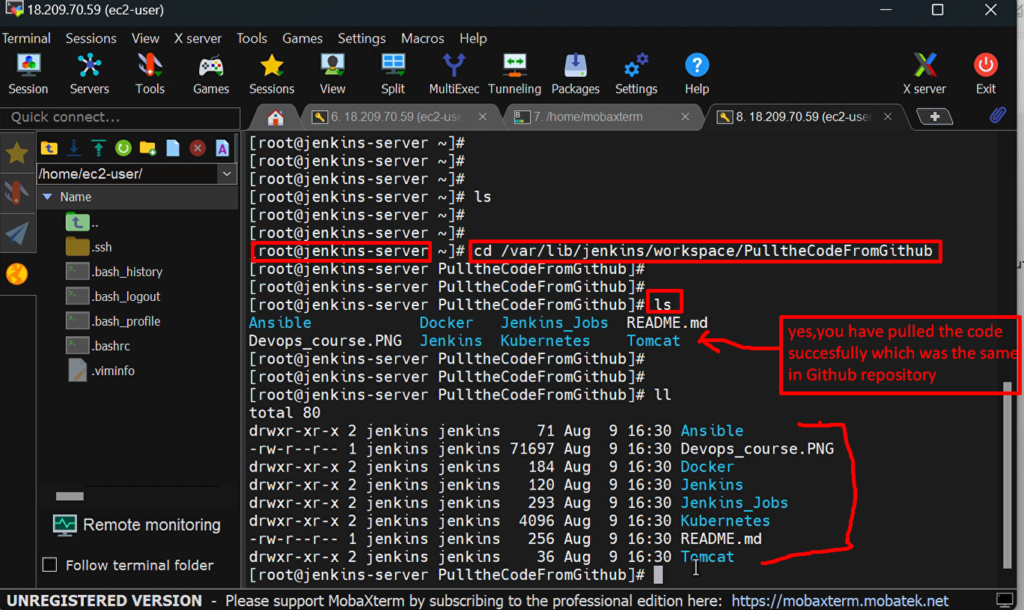
Step 3:- verify that you have pulled the code into Jenkins or not.
Step 1: Create a New Fresh Job To Pull The Code


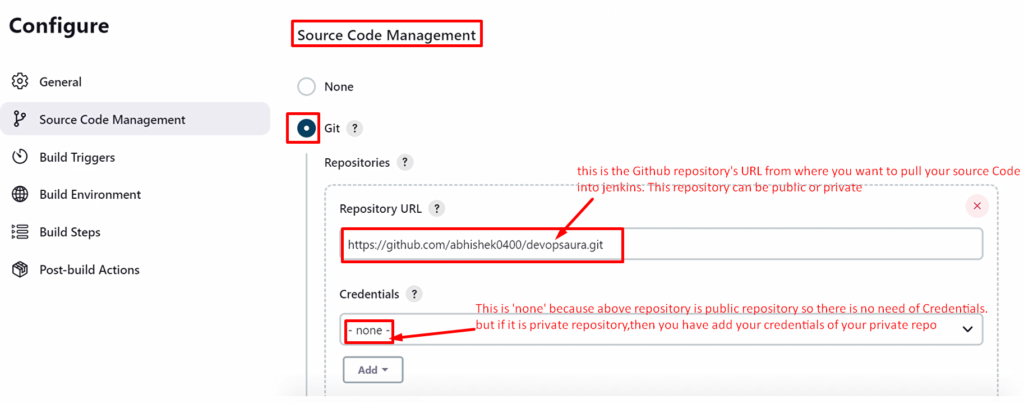
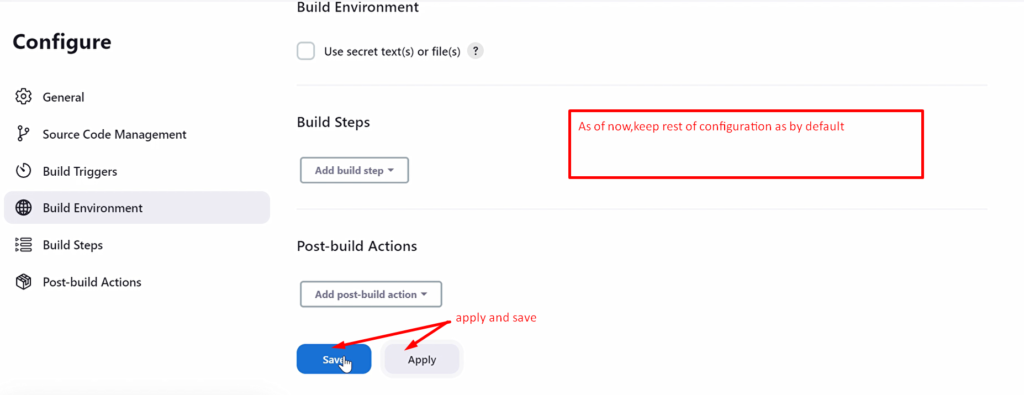
Step 2: Run(build) that job to pull the source code
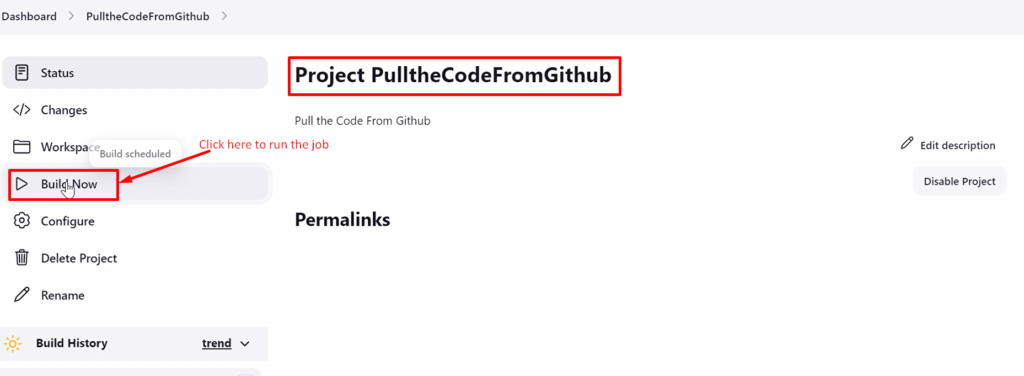
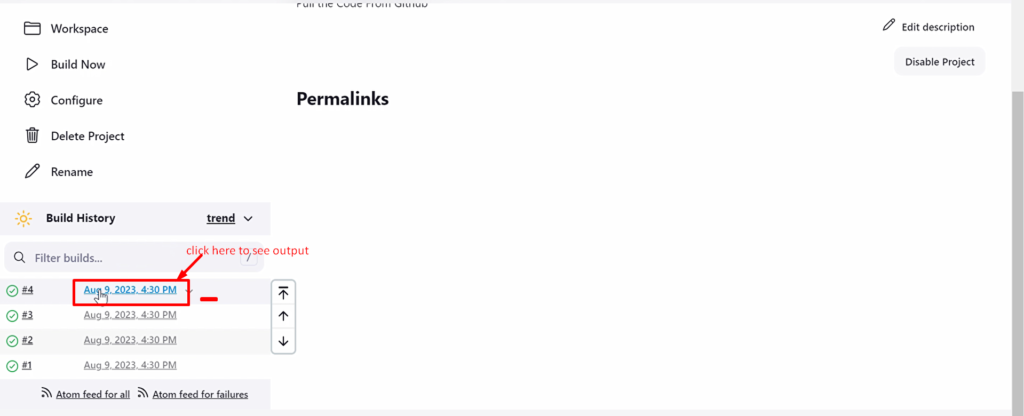


The point to remember is –By default, Jenkins is going to store all build-related information inside the workspace folder i.e /var/lib/jenkins/workspace/
Step 3:- verify that you have pulled the code into Jenkins or not.

Video recording
Integrate Maven to Jenkins:-
Note:- Here, we are going to use the Jenkins server as the build server to reduce complexity. Otherwise, we can make a separate Maven build server
Here, we are going to integrate Maven into Jenkins.
For this setup, we follow the below steps-
Step 1:- setup Maven on the Jenkins server

Step 2:-Setup Maven Environment

               JAVA_HOME, M2, M2_HOME

Step 3:-Install Maven Plugin

Step 4:-Configure Maven and Java
