- In the previous Modules, we have seen how to build the Jenkins pipeline to build the code and deploy it on a VM or Tomcat server
- In this section, we will see how we can deploy our code on Docker container.
Table of Contents
Integrating Docker in CI/CD Pipeline
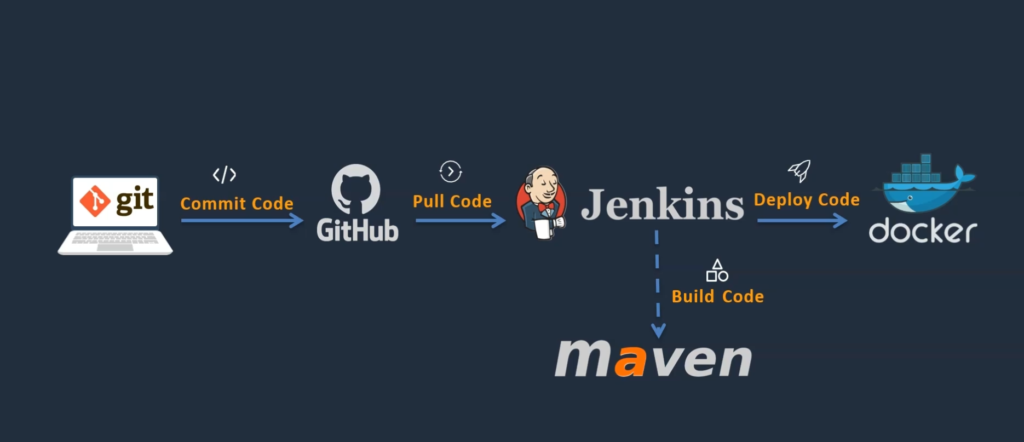
The procedure is the same. I mean to say that we will pull the code and build it with the help of Maven, but instead of deploying it on our VM, we will deploy it in our docker container.
Of course, this environment is ready. Except for this Docker environment.
for this, we need a Docker host. On top of that, we will install Docker so that we can run our Docker containers.
Let’s go and see how we can set up this Docker environment.
Setup Docker Environment OR Setup Docker Host
we will follow the below steps to setup Docker Host-
- Setup a Linux EC2 instance
- Install Docker on the EC2 instance
- Start docker service

STEP 1:- Setup a Linux EC2 Instance
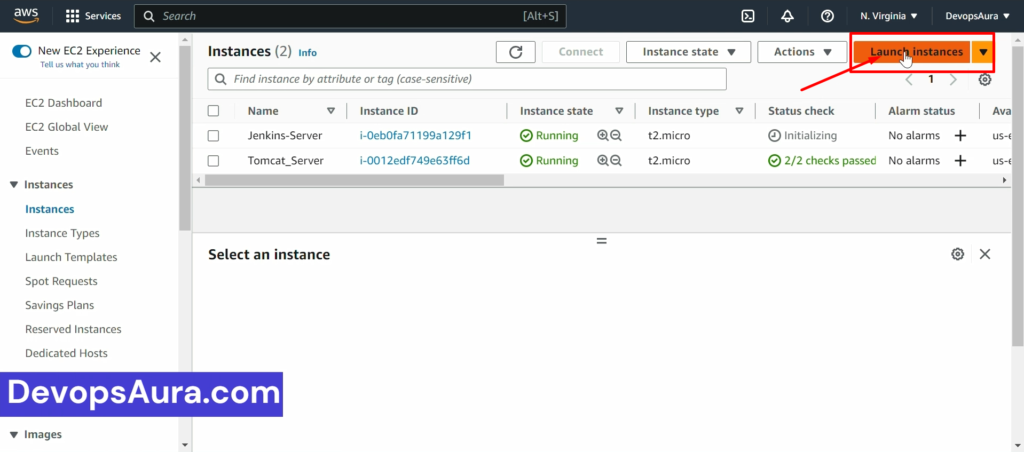
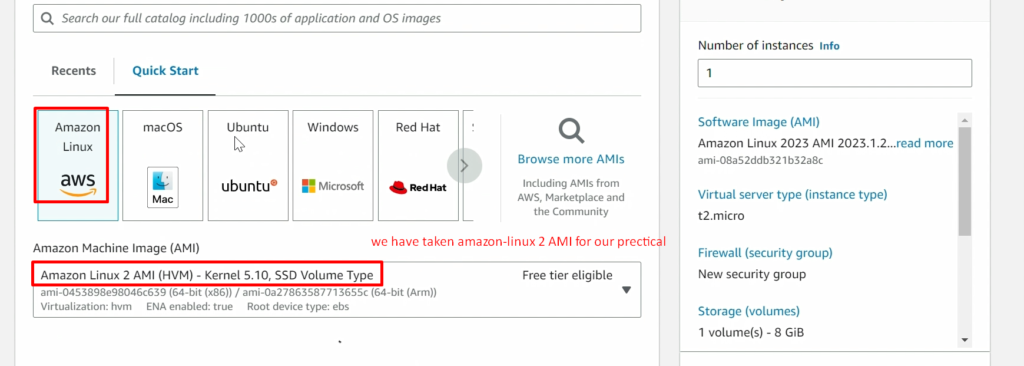
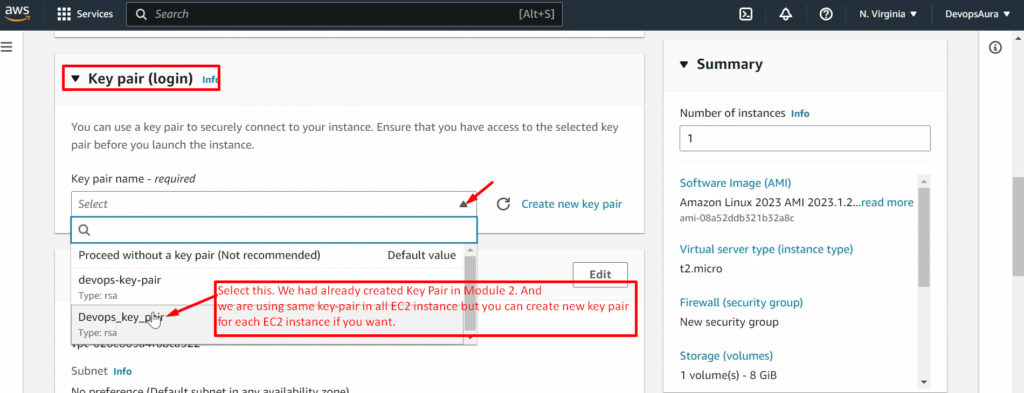
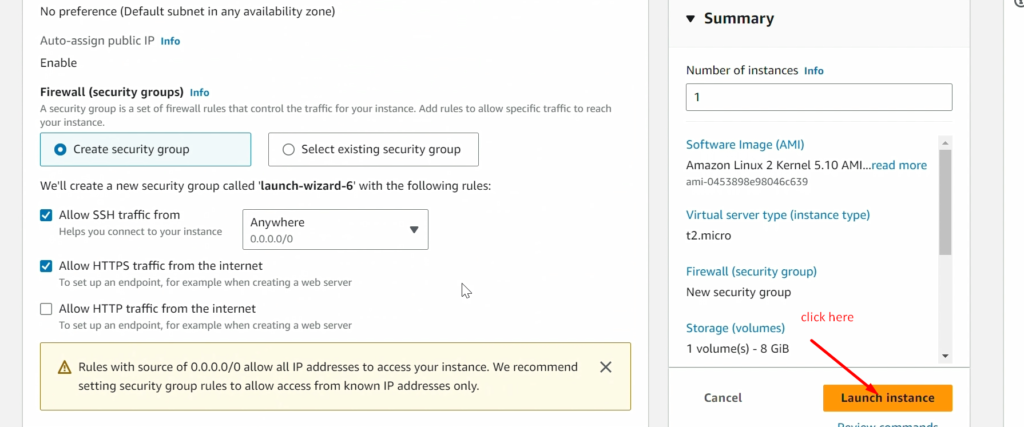
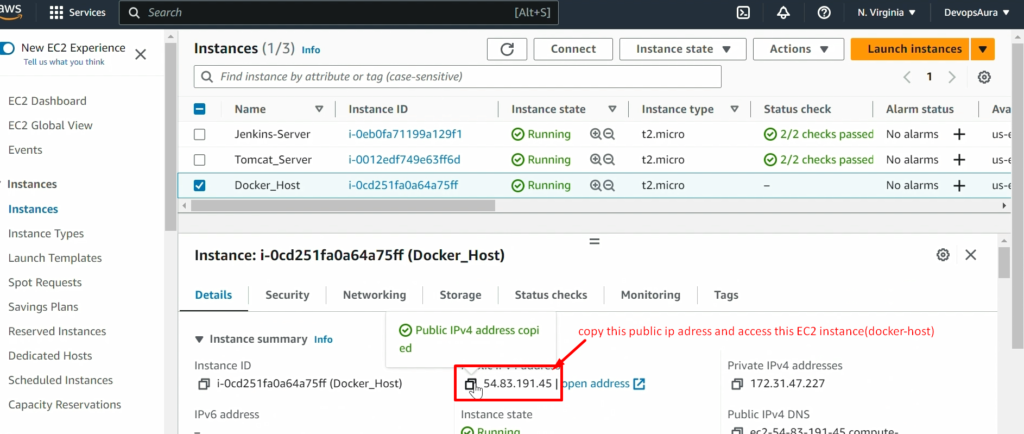
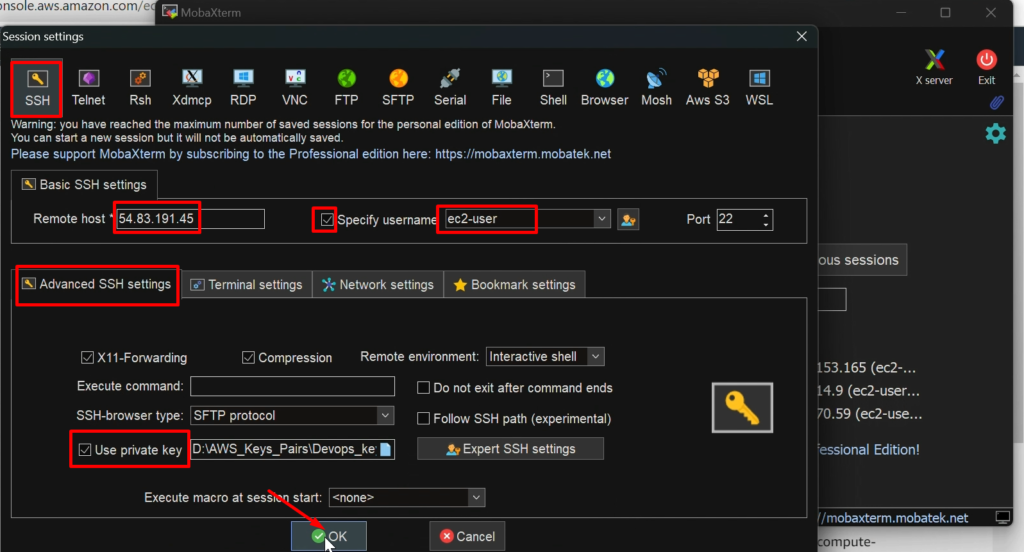
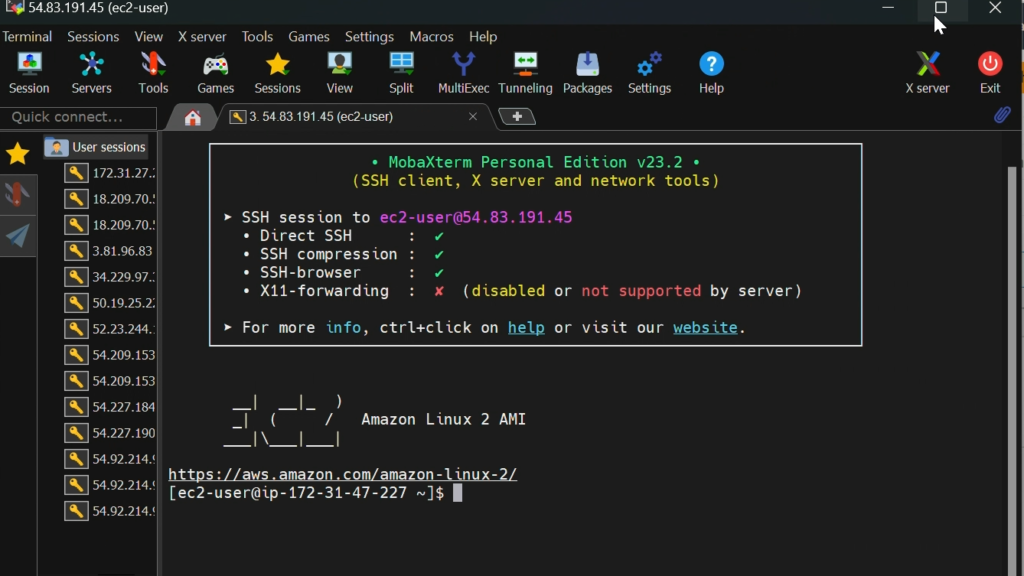
STEP 2:- Install Docker on EC2 instance
Now, We will install docker on EC2 instance(docker-host) with the help of below commands
					sudo su -
yum install docker -y
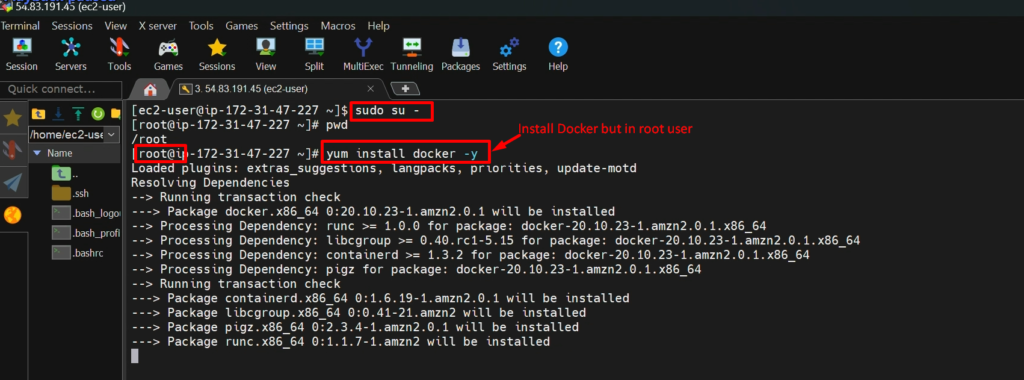
Step 3:- Start Docker service
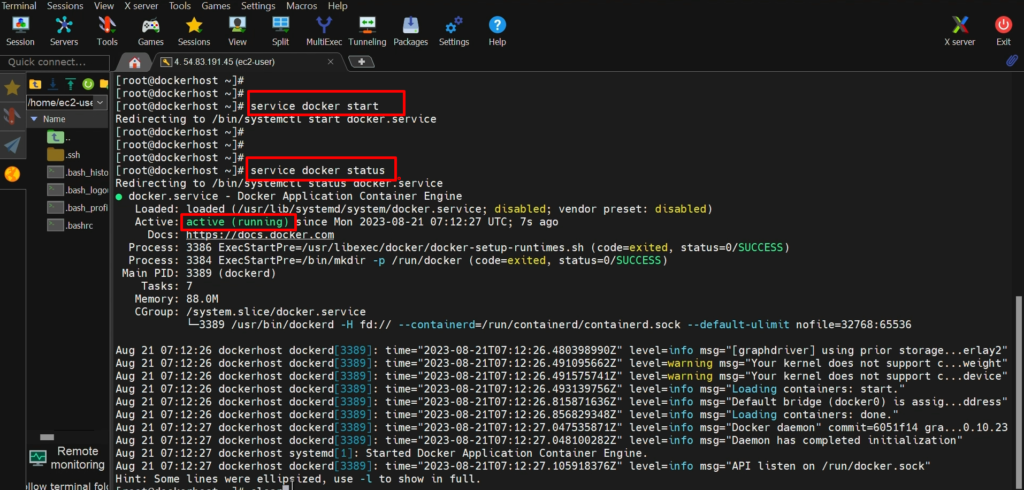
We will start docker service after installing with the help of below command
					service docker status
service docker start
service docker status
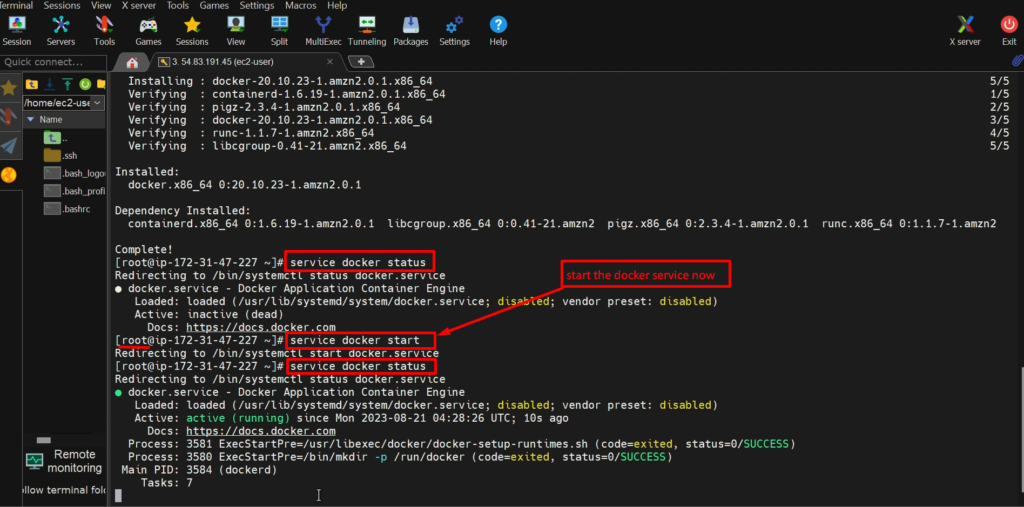
Successfully, we have install docker on docker host(EC2 instance) and docker service is runing
Basic Useful Commands-
docker images= will show you how many images are there
docker ps = To show only running container
docker ps -a = To show all container(includes stopped container)
docker –help
					docker images
docker ps
docker ps -a
docker –help

Video recording
Still you have any doubt in any steps, please go through this video again
How to Create A tomcat Container
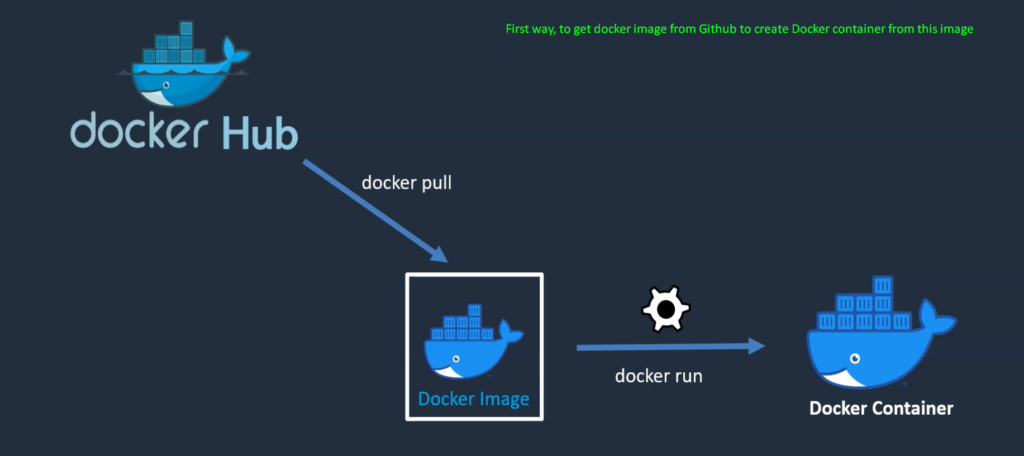
To create a docker container, we need a docker image. With the help of a docker image, we create a container with the command “docker run”
So, there are Two Methods to get a docker image-
- We can get a docker image from DockerHub
- We can create a docker image from Dockerfile.
1.We can get a docker image from DockerHub
2.We can create a docker image from Dockerfile.
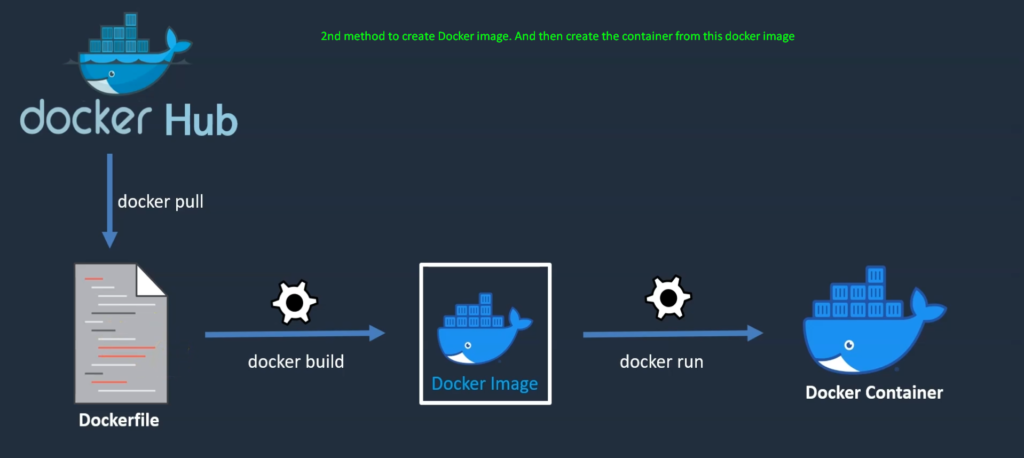
Here, also we will pull the image from Dockerhub but by Dockerfile instruction inside the customized Dockerfile
Method-1: Create The Docker container.
we will do the following steps to create a Docker image from DockerHub and then create a container with the help of this Docker image. that is the way 1st.
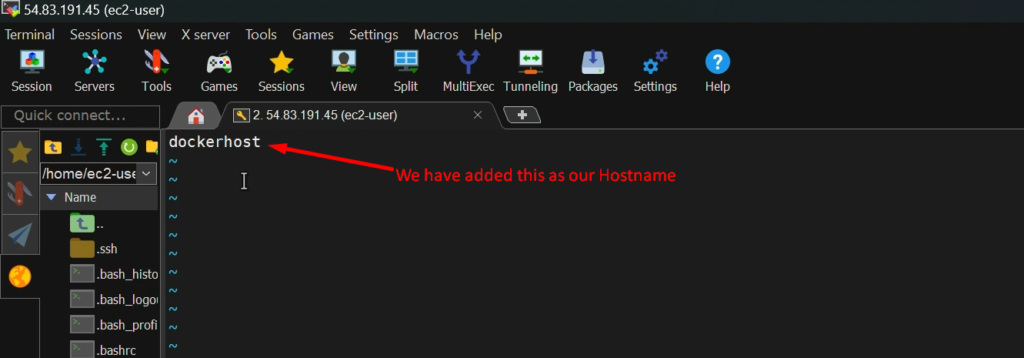
Step 1: – First, we will change the Hostname for ec2 for our convenience only
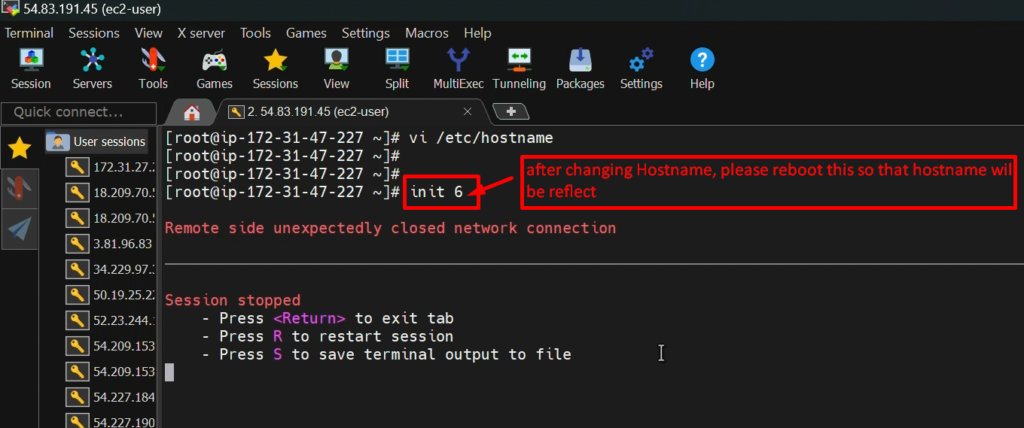
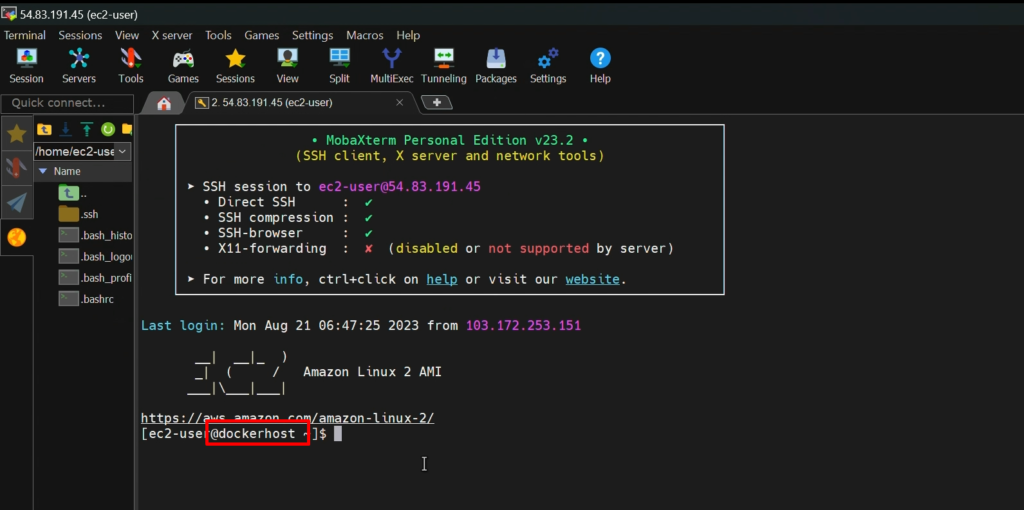
we will change the hostname of our EC2 instance with the help of the below command. and then we will reboot the EC2 with command ‘init6’, So that these changes will be affected.
					vi /etc/hostname
Init 6     (for reboot)


NOTE:- If you have not created a Docker Hub account then please create one DockerHub account. But it’s not necessary to have a Docker Hub account to pull an image from DockerHub. To push an image in Docker Hub, you should have a Dockerhub account.
To create a docker hub account, please click here
Step2- pull the image from DockerHUb
we will use the below command to pull the image from DockerHUb
					service docker status
service docker start
docker pull tomcat
docker images
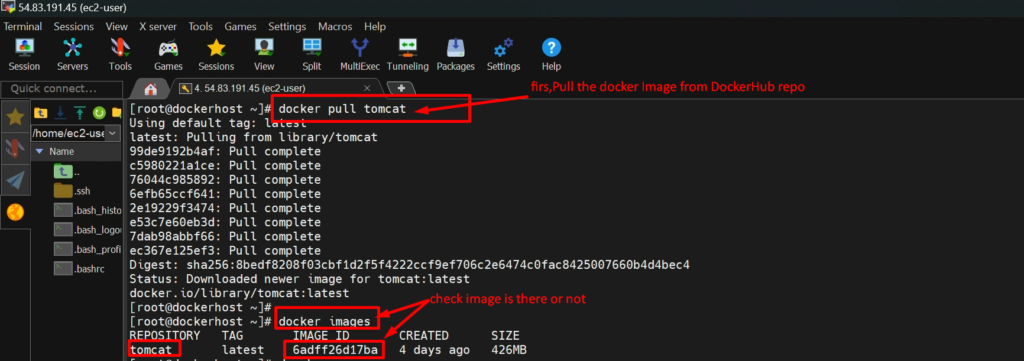
Step 3- Now create a container from the docker image
docker run -d --name tomcat-container -p 8081:8080 tomcat

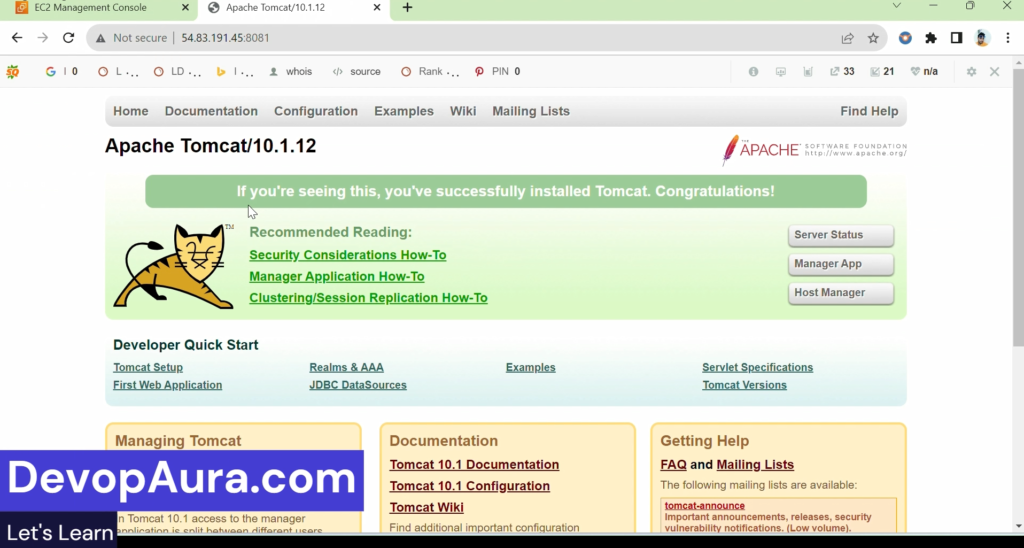
Step 4: – Now access the docker container from the browser.
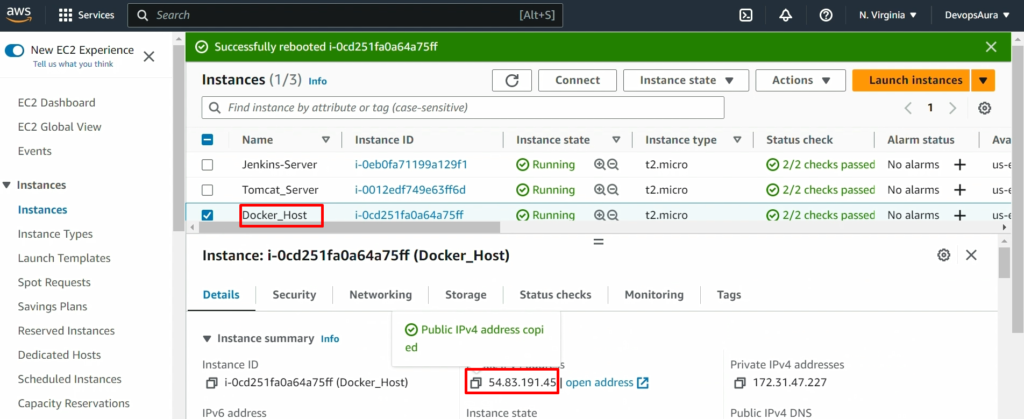

NOTE: – Don’t forget to add port no 8081 in the security group of the docker host but here we have enabled port no 8081 to 9000 at one go
Video Recording
Still you have any doubt in any steps, please go through this video again
Fixing the Tomcat Container issue

We need to copy the content of ‘webapps.dist to ‘webapps’
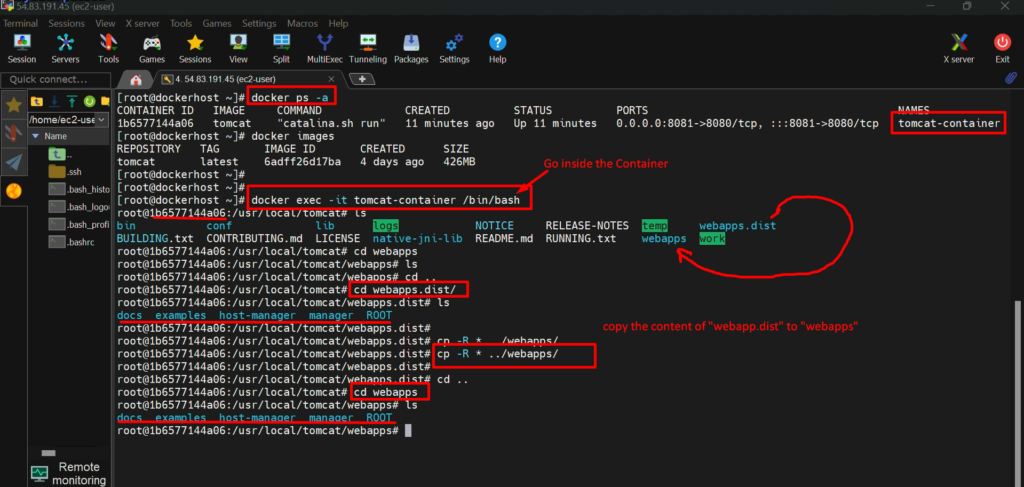

- The issue is resolved now But this issue is resolved only in this container because whatever we have changed, we did inside the container. So it’s a temporary fix issue
- If again we create a new container, we will get the same error “HTTP 404”
- To overcome this issue, we will create a Dockerfile and pull the Tomcat image with the help of Dockerfile instructions.
- If you want to know more about “How to create Dockerfile” please click here
Refrenece: Dockerfile documentation
Video Recording
Still, if you have any doubts about any steps, please go through this video again.
How to create our First Dockerfile
We have created our first Dockerfile in another post. if you want to know ‘How to create a Dockerfile‘ please click here
Method 2: Create The Docker container from Dockerfile.

- We will Create a Customized Dockerfile to create a Tomcat Container. Also, it will fix the ‘HTTP 404’ issue permanently which we were facing in Method 1.
- We will do the following steps to create a container and fix the issue ‘HTTP 404’
Step1: – create a new Dockerfile
First, we will remove our Dockerfile which was created in the previous step. if you haven’t created any docker file yet, then no need to remove it because you don’t have one.
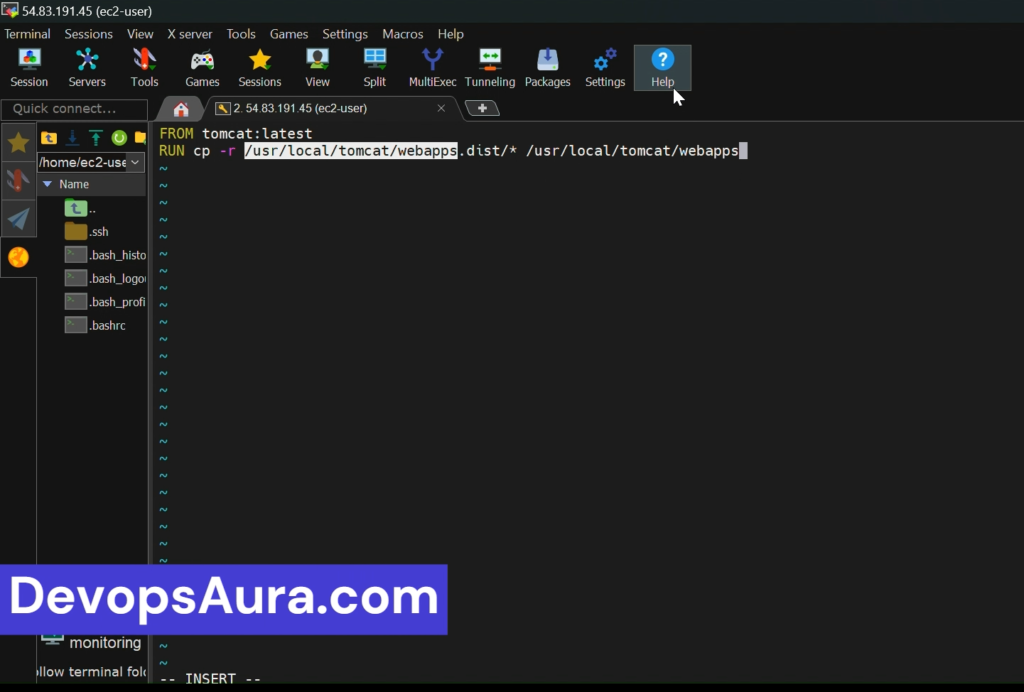
After removing our old Dockerfile, we will create a new Dockerfile. for that , we will use below commands
					rm Dockerfile
vi Dockerfile
FROM tomcat:latest
RUN cp -R /ust/local/tomcat/webapps.dist/* /usr/local/tomcat/webapps


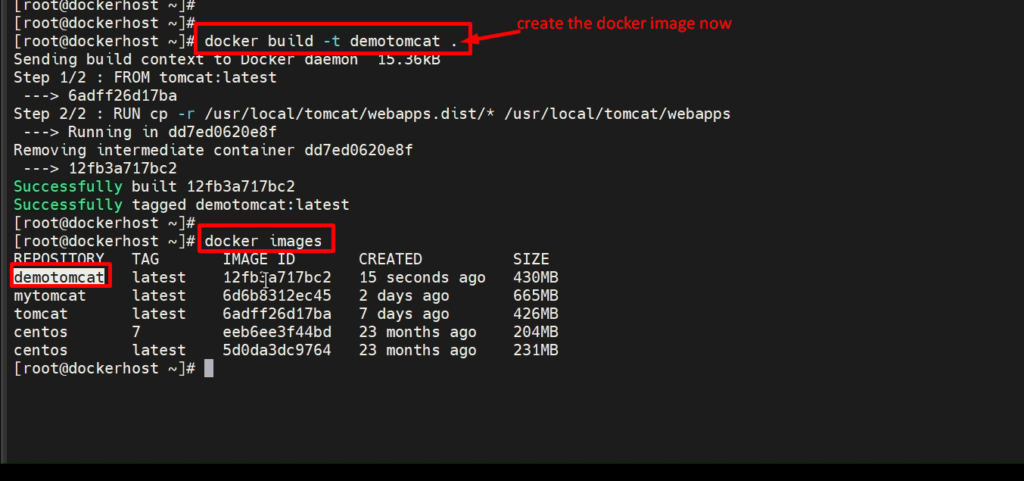
Step 2:- Now create an image from this Dockerfile
					docker build -t demotomcat .
docker images
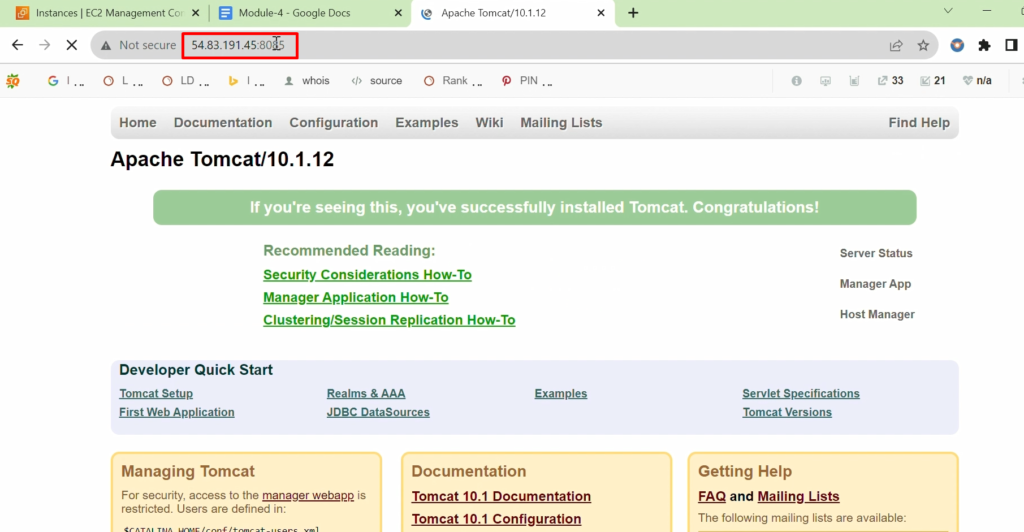
Step 3:- Now, we will create a Docker container from the above image ‘demotomcat’
docker run -d –name demotomcat -p 8085:8080 demotomcat

Step 4:- Now access the Tomcat container from the browser
Still, if you have any doubts about any steps, please go through this video again.
Integrate Docker with Jenkins

We will do the following steps to integrate Docker with Jenkins-
Step1) Create a "dockeradmin" user

Step2) Install the “publish over SSH” plugin

Step3) Add Docker-host to Jenkins “Configure System”
Step 1: – Create a ‘dockeradmin’ User.
Please run Below commands to create User. And set the Password for user “dockeradmin”
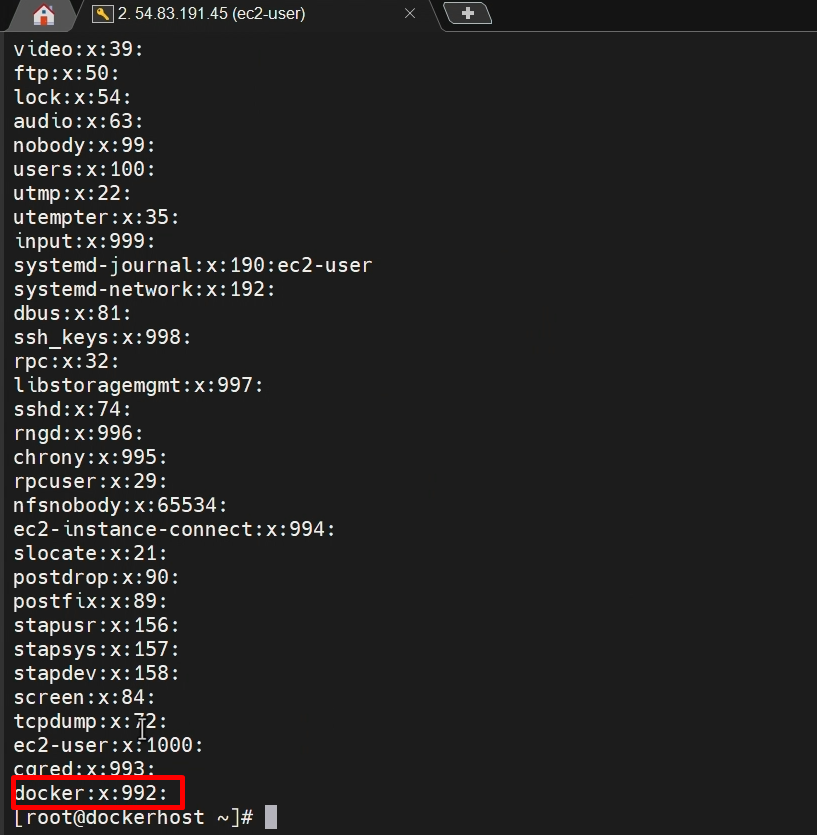
					cat /etc/passwd
cat /etc/group
useradd dockeradmin
passwd dockeradmin
Id dockeradmin
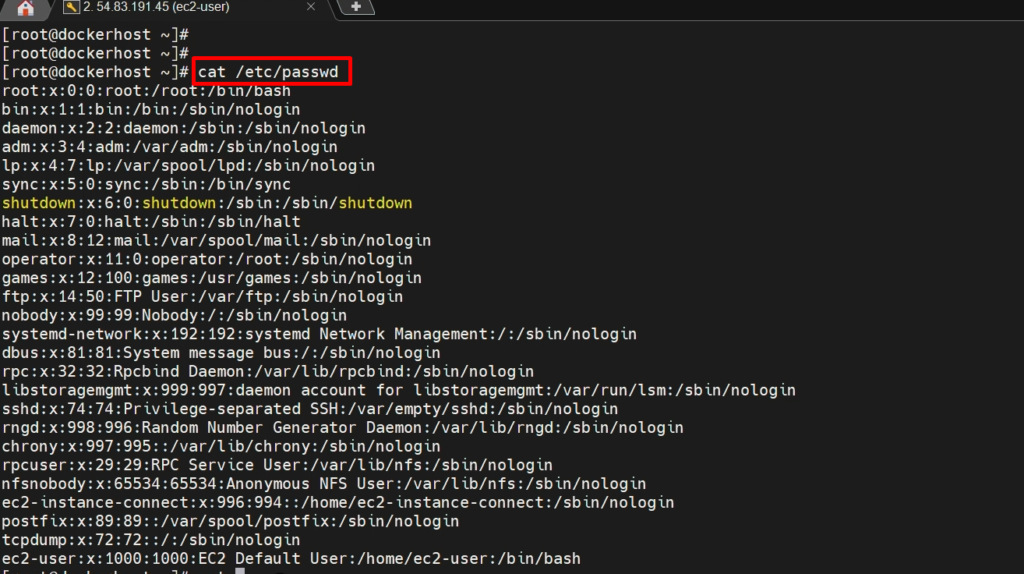

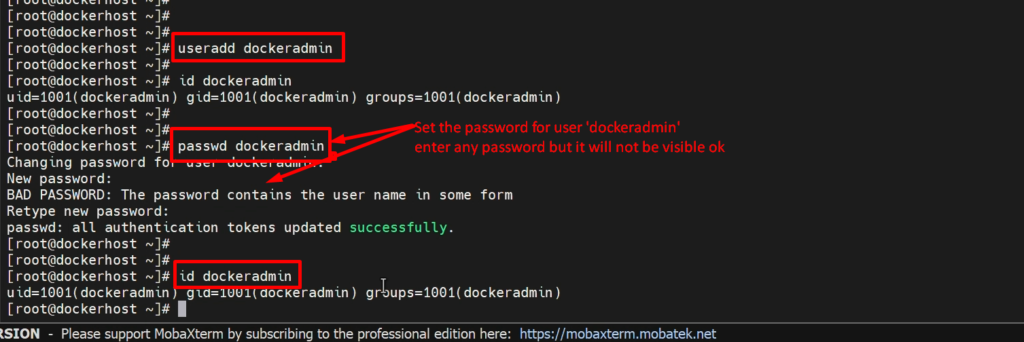
Now we will add that user “dockeradmin’ in the ‘docker’ group. for this, please run the below command.
Usermod -aG docker dockeradmin

Now login in duplicate session as “dockeradmin”
NOTE: – It will refuse because by default EC2 instances don’t allow password-based authentication. So, we need to explicitly enable it. and we can enable it to edit this file “/etc/ssh/sshd_config”
vi /etc/ssh/sshd_config
vi /etc/ssh/sshd_config

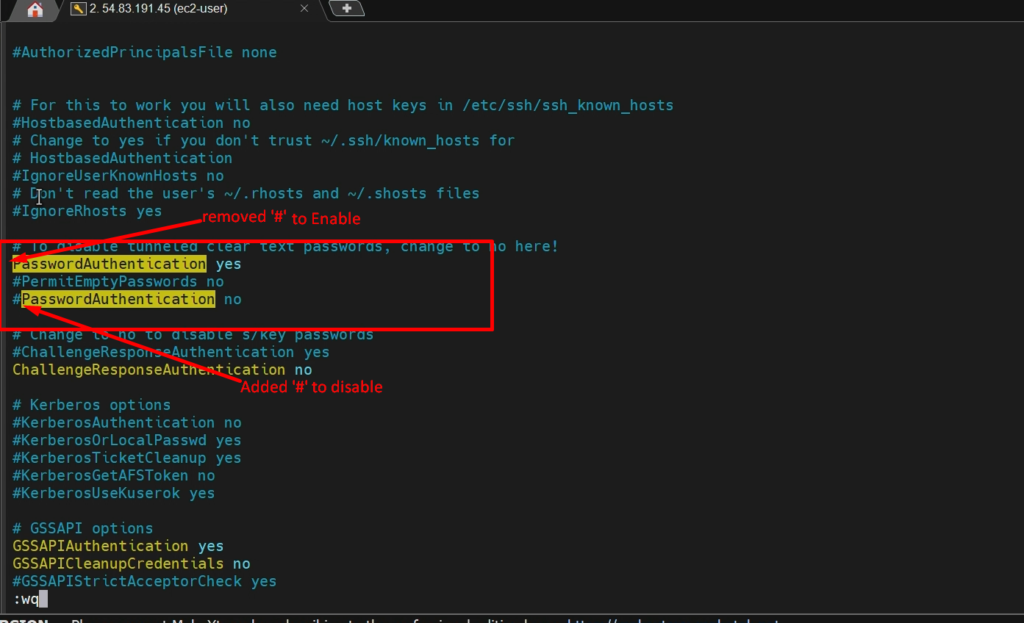
After editing the file, please run the below command.
service sshd reload

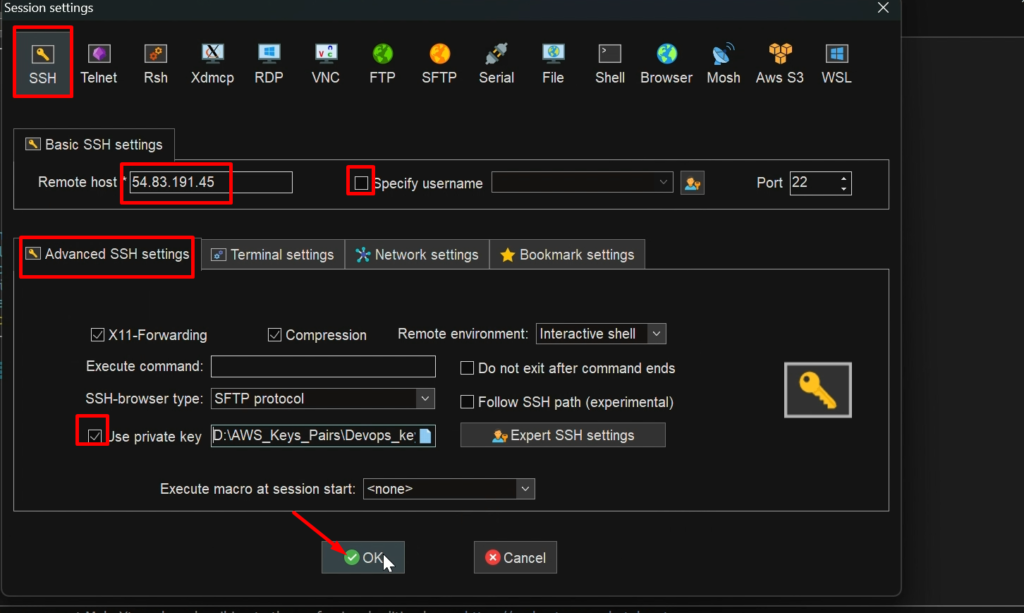
Now, we will access as ‘dockeradmin’ user.

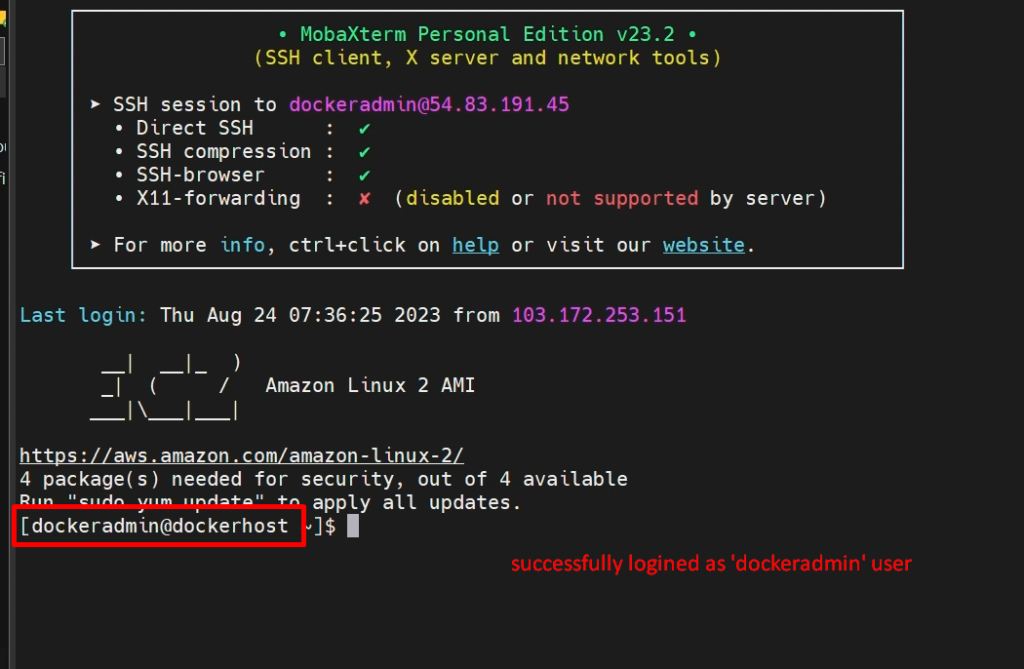
Step 2) Now we install the plugin in Jenkins.
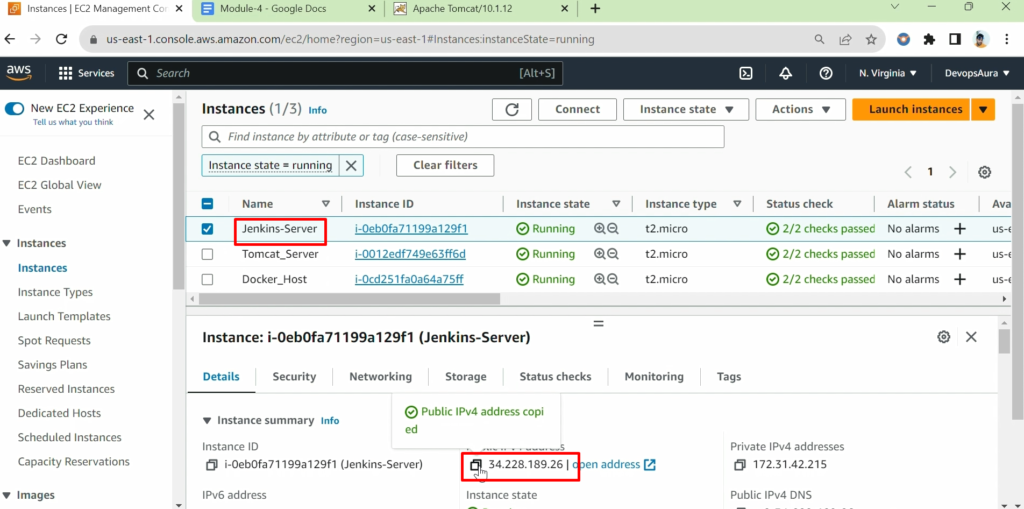
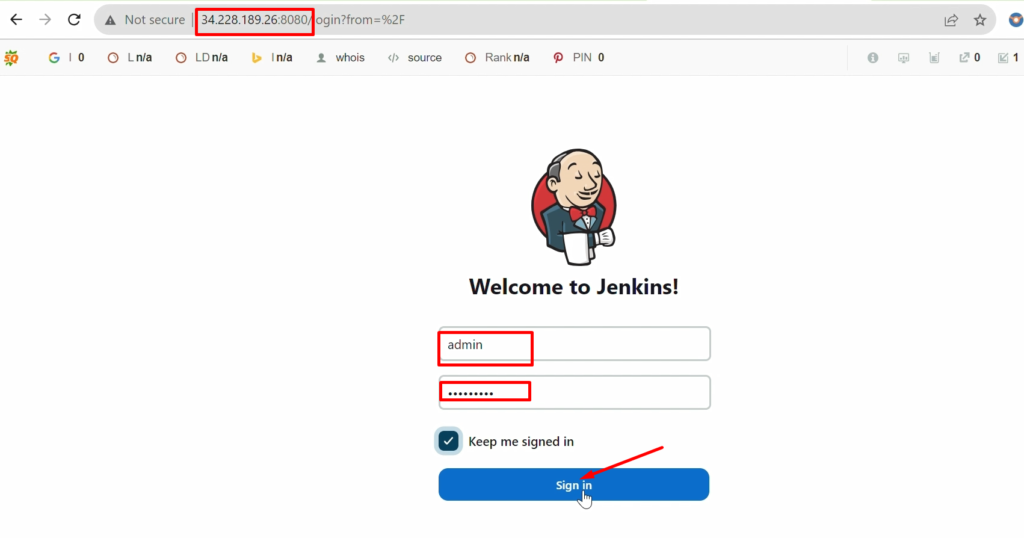
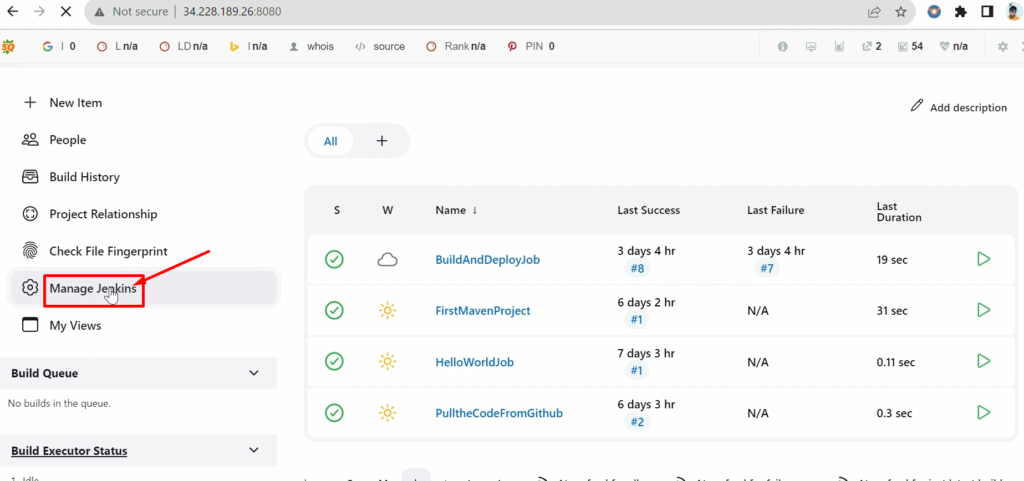
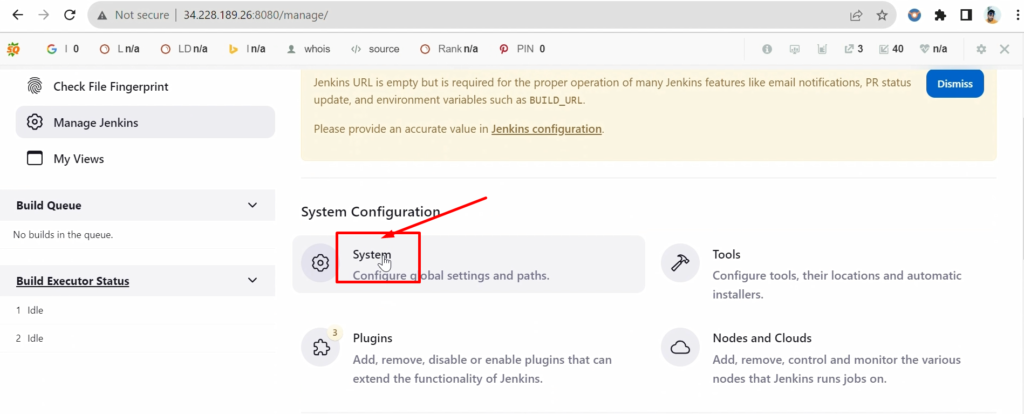
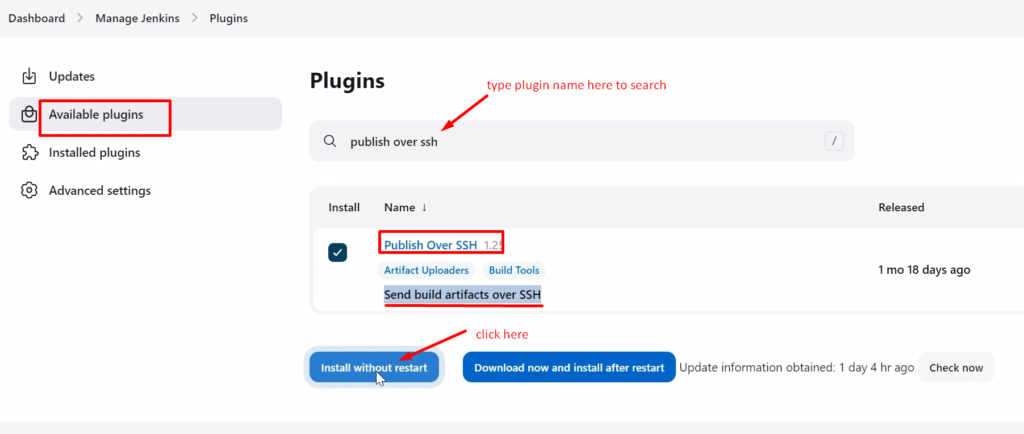
STEP 3) Now we need to configure docker-host in Jenkins

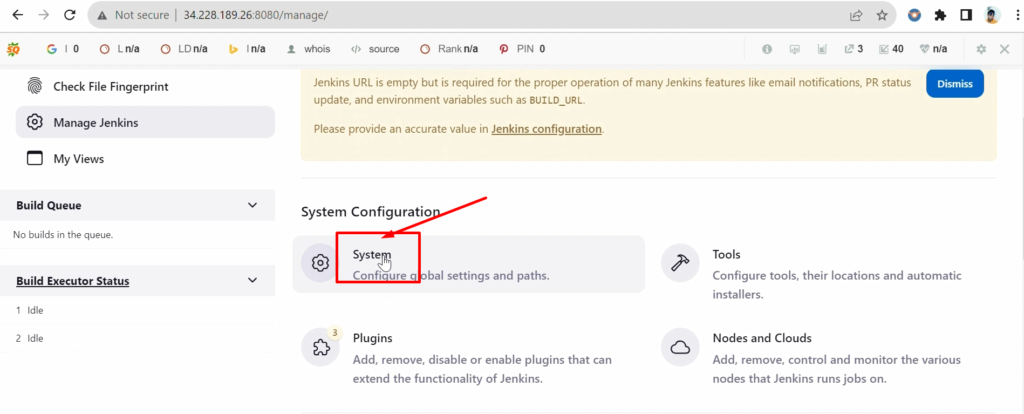
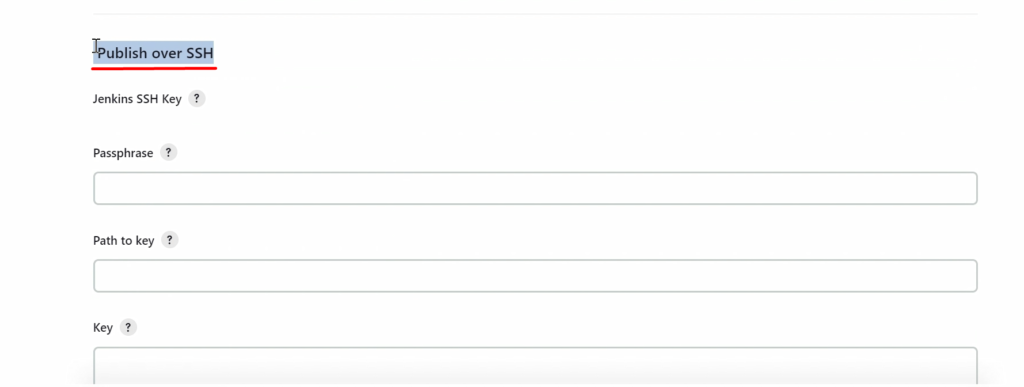
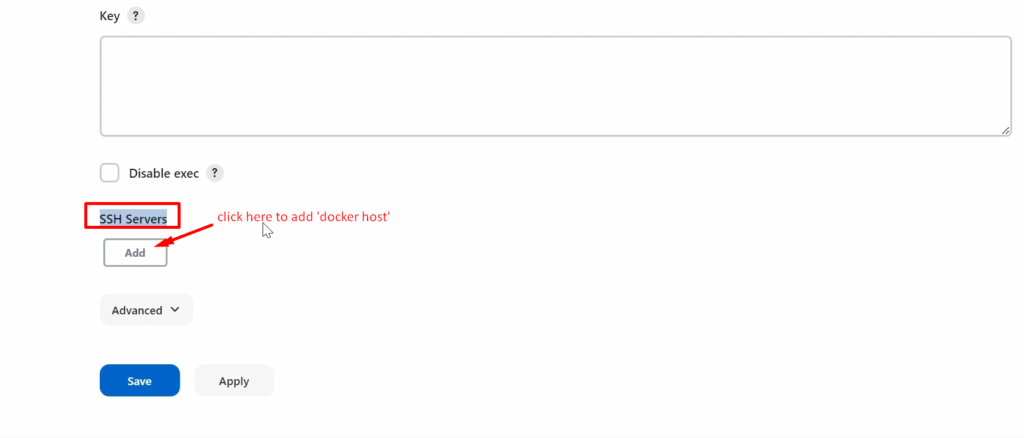
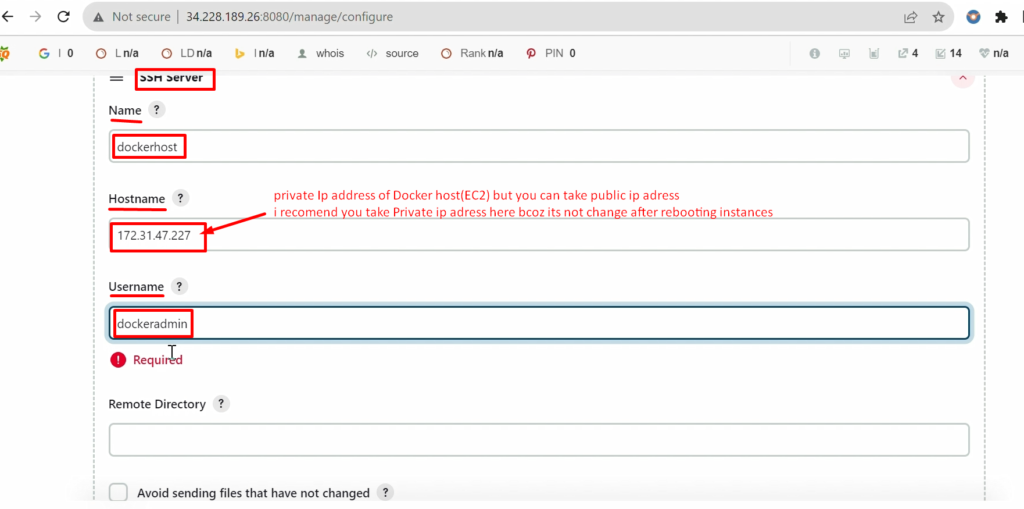
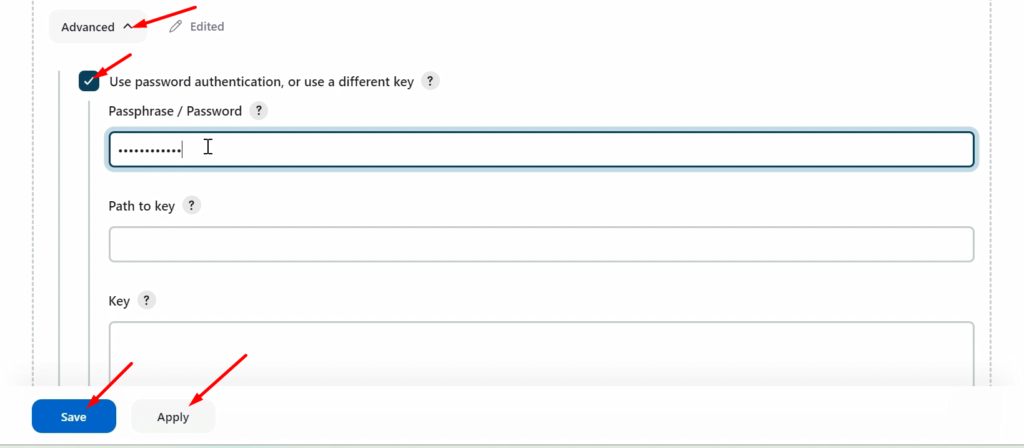
NOTE: – The IP address of the Hostname can be public IP or private IP. but we will choose a private ‘IP’ address because public IP addresses always change after rebooting EC2 instances.
Jenkins's job to Build and copy artifacts onto to docker host

- In the Previous step, we integrated the docker host into Jenkins.
- Now we will create a new Jenkins job to pull the code from GitHub and build that code with the help of Maven to create artifacts. And then copy that artifact onto the Docker Host.
- Once the artifacts are available on the docker host, from there it will be easy to copy them inside the container.
please do the following steps as per below s screenshot
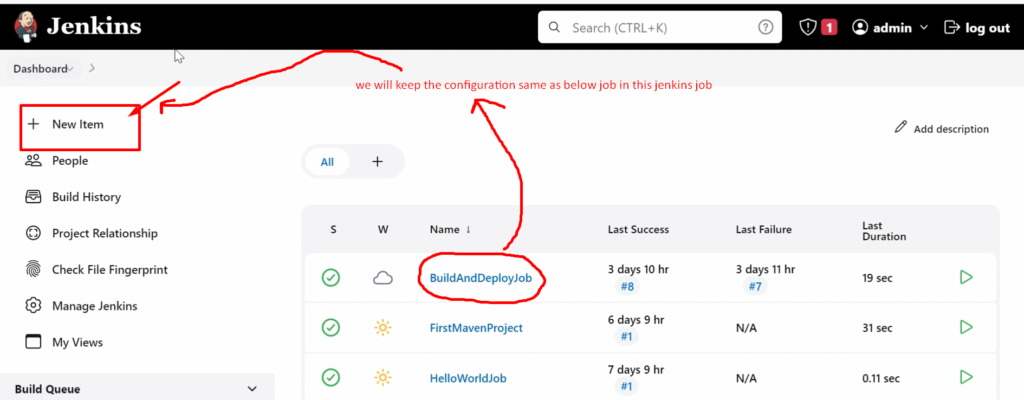
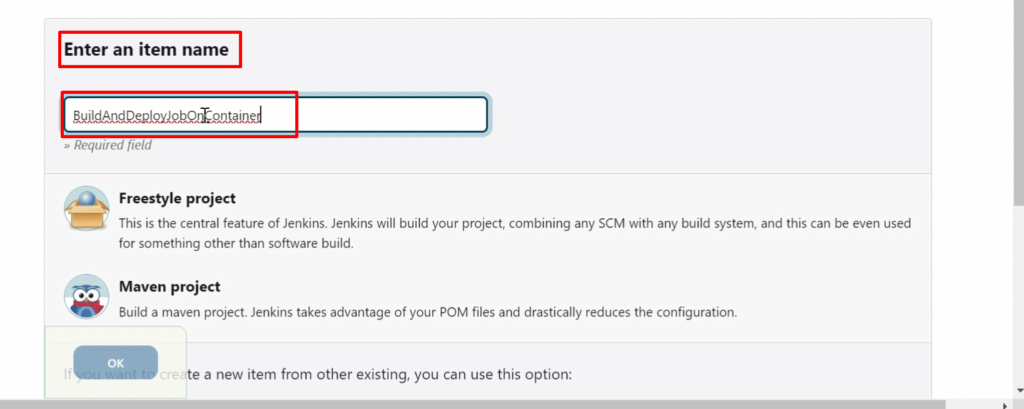
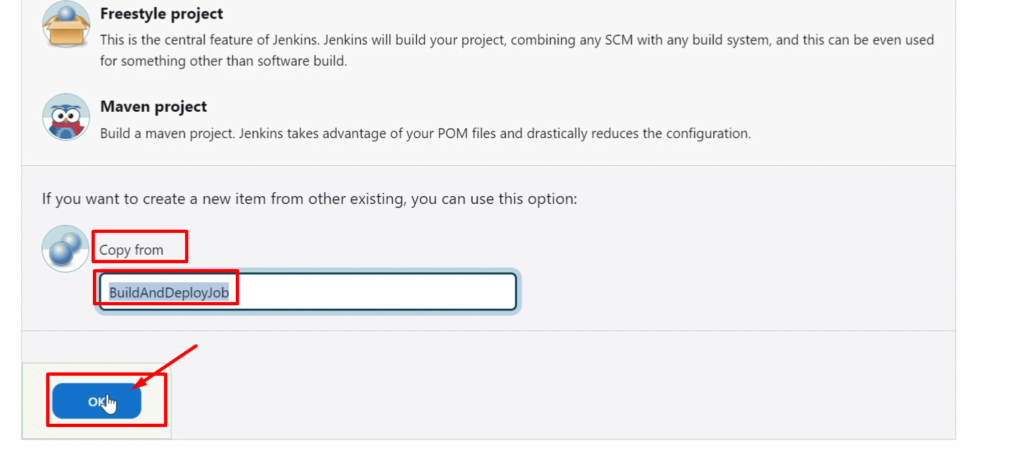

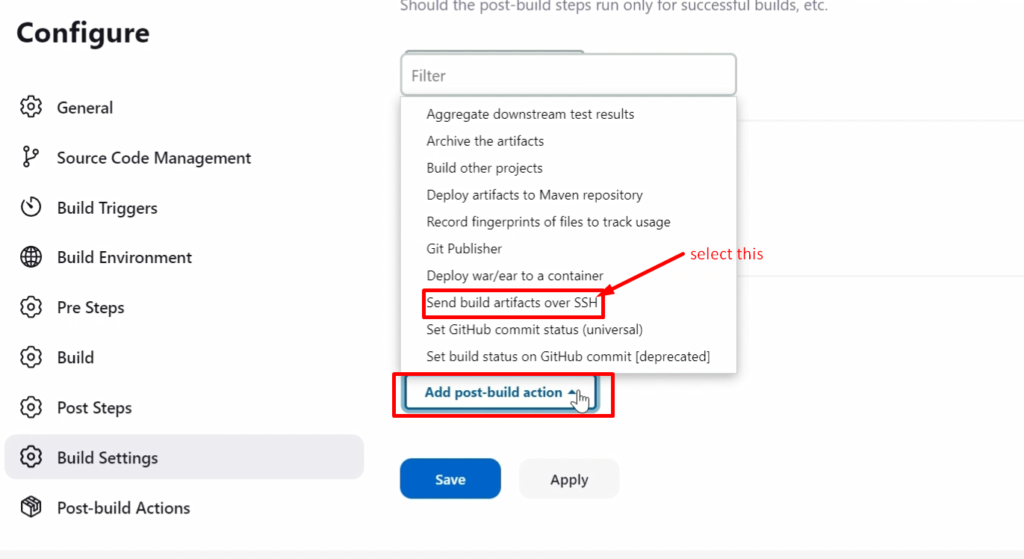
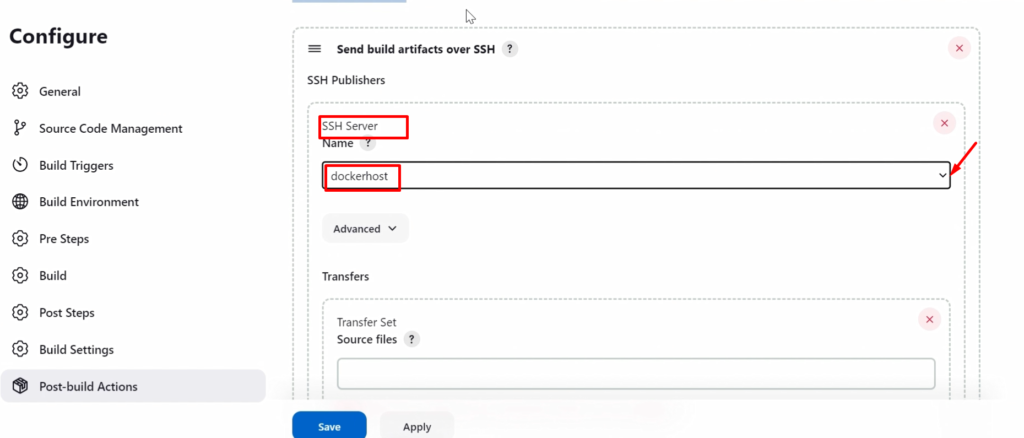

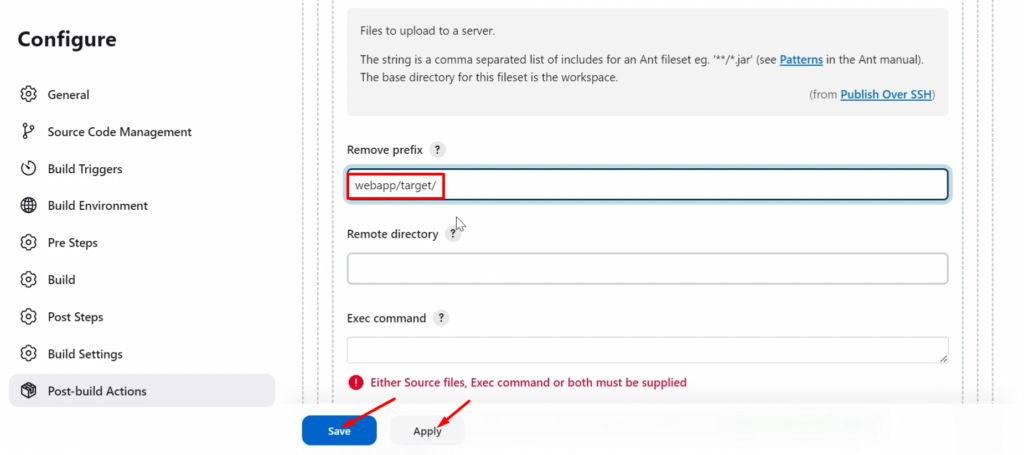
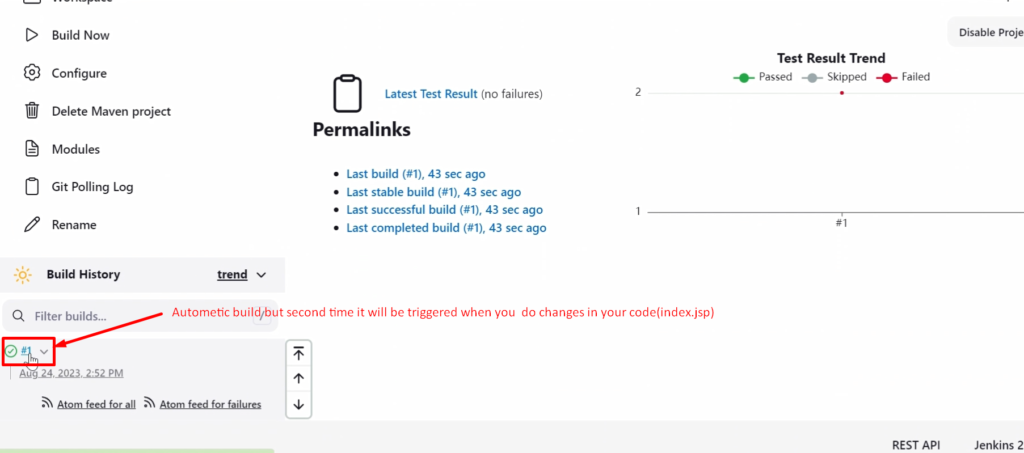
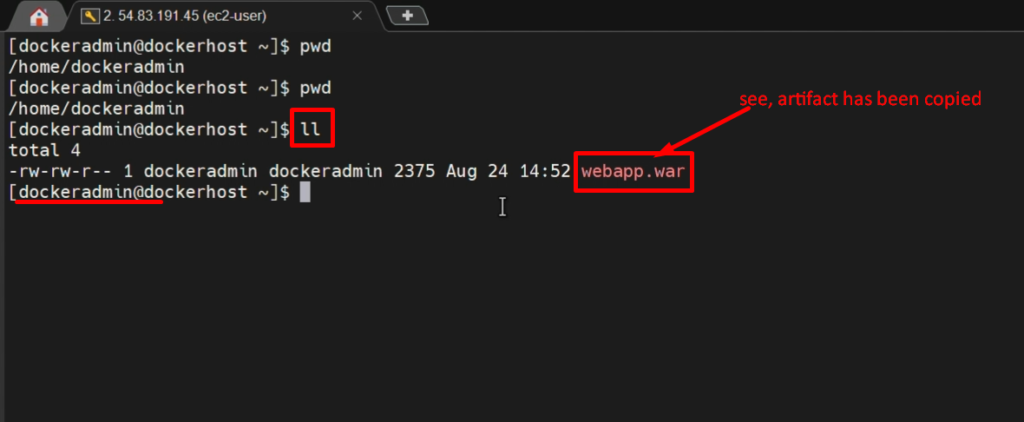
Verify that it successfully copied the artifact or not.
NOTE:- Above Build was automatic triggered because of POL SCM scheduled on every min but next time it will triggered when you do any changes in code and push to Github.
Video Recording:-
Update Tomcat Dockerfile to automate the deployment process
In the previous step, we created a Jenkins job to build the code and copy it onto the docker host.
Now, it is time to create an Docker image along with an artifact(war file) so that whenever we launch a new container, it will come with an application
We will do the following steps
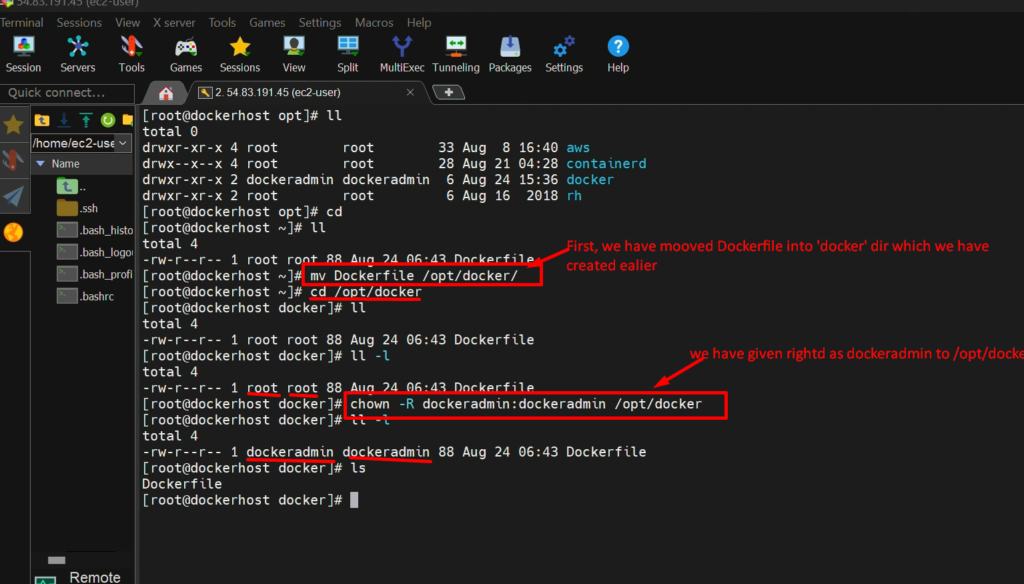
Step1:- First, we will make one directory(folder) named ‘docker’ inside /opt and then give ‘dockeradmin’ rights to ‘docker’ directory. for this please run below commands
					cd /opt
mkdir docker
chown -R dockeradmin:dockeradmin docker
ls -l
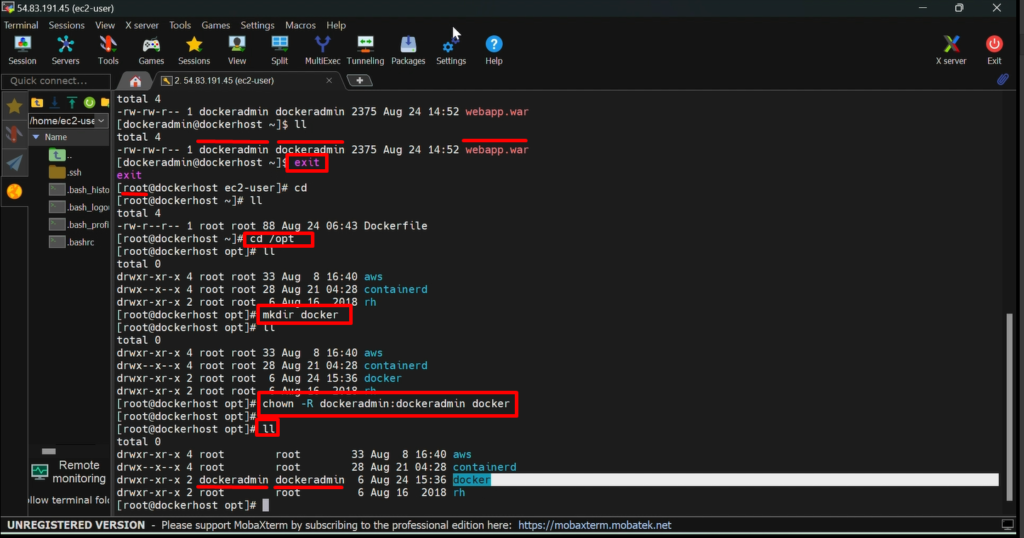
Step 2:- Then we will move our ‘Dockerfile’ into the ‘docker’ folder and then again we will give ‘dockeradmin‘ rights to ‘/opt/docker’. please run the below commands
					mv Dockerfile /opt/docker
chown -R dockeradmin:dockeradmin /opt/docker
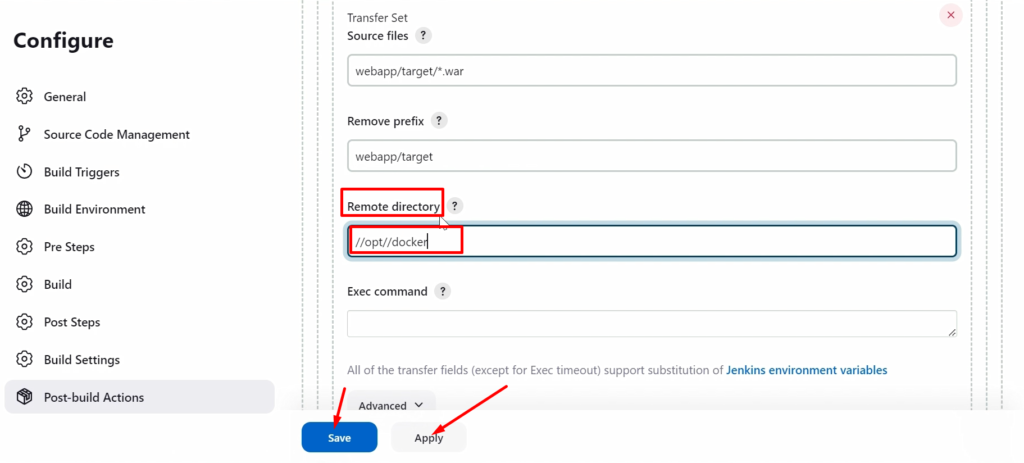
Step 3:- Go to again Jenkins ”Build job’s configure and add ‘//opt//docker’ into remote directory section
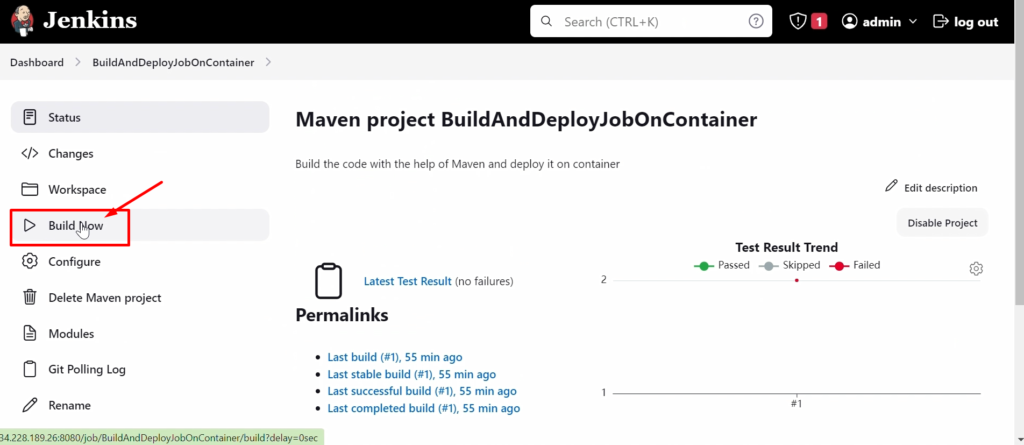
After building the job successfully, please check artifact is copied or not?

Step 4:- Now, we need to create a container along with this war file(artifact). Then only we can access the application from the browser.
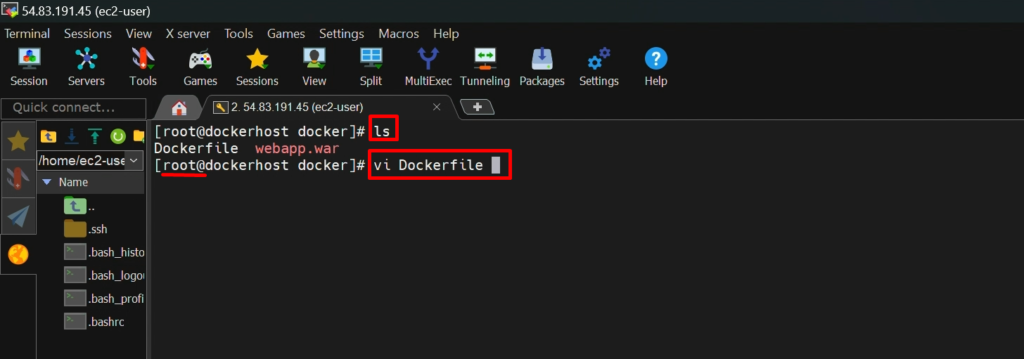
For that, we will make small changes in the ‘Dockerfile’(which means we will copy the artifact). for that, we need to add the below instructions into the ‘Dockerfile’
COPY ./* /usr/local/tomcat/webapps
					vi Dockerfile
COPY ./* /usr/local/tomcat/webapps
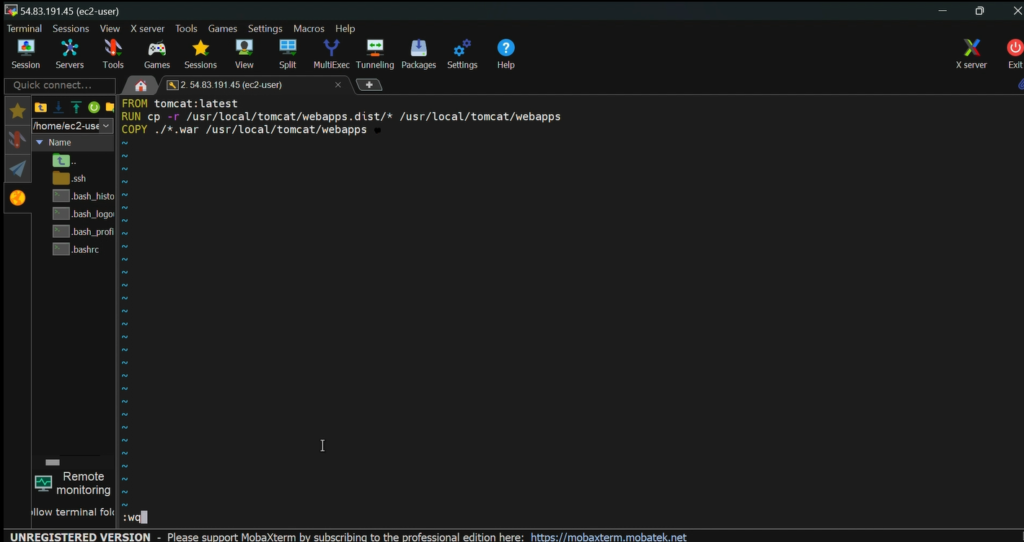
Step 5:- Now create an image from the above ‘Dockerfile’ with the help of below command
					docker build -t tomcat:v1 .
docker images
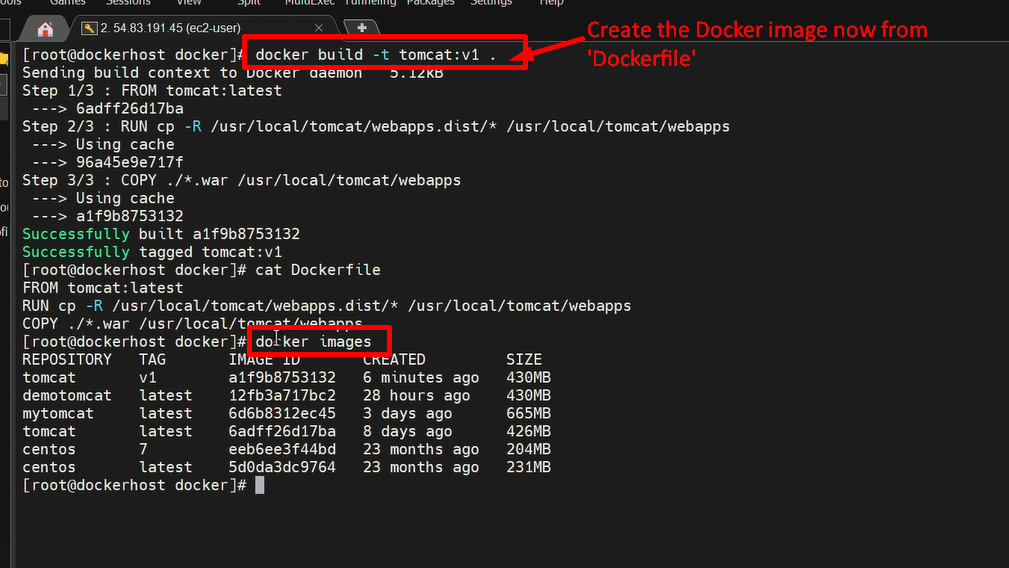
Step 6:- Now , we will create Docker container from the above docker image ‘tomcat:v1’
					docker run -d --name tomcatv1 -p 8086:8080 tomcat:v1
docker ps
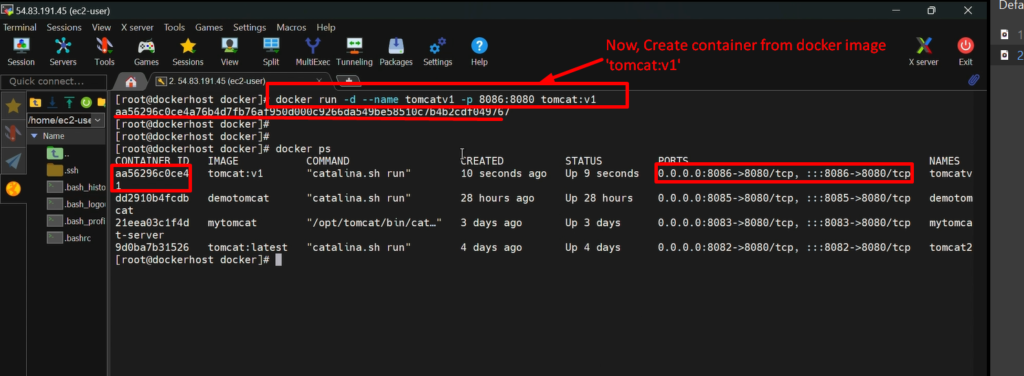
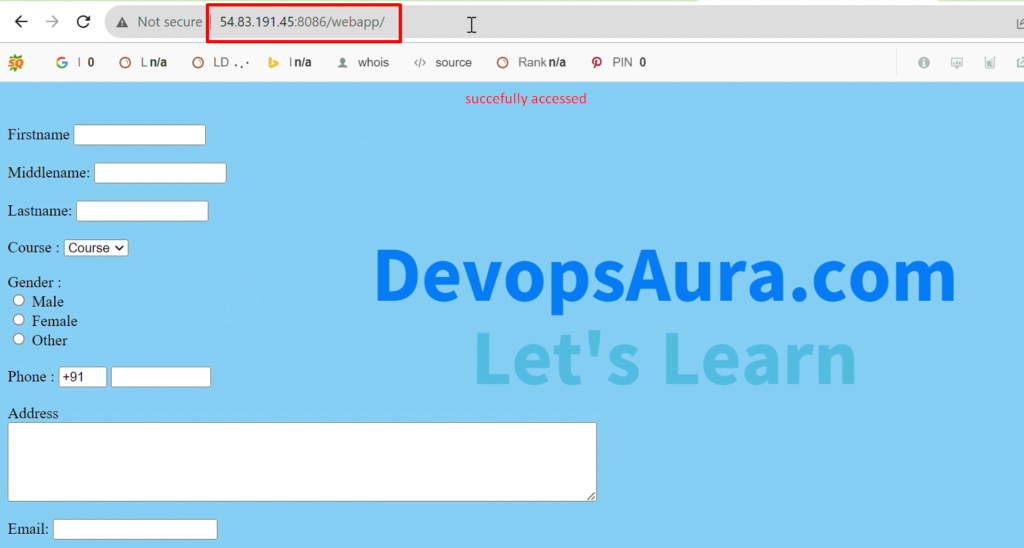
Step 7:- Now , we will access the application on tomcat container
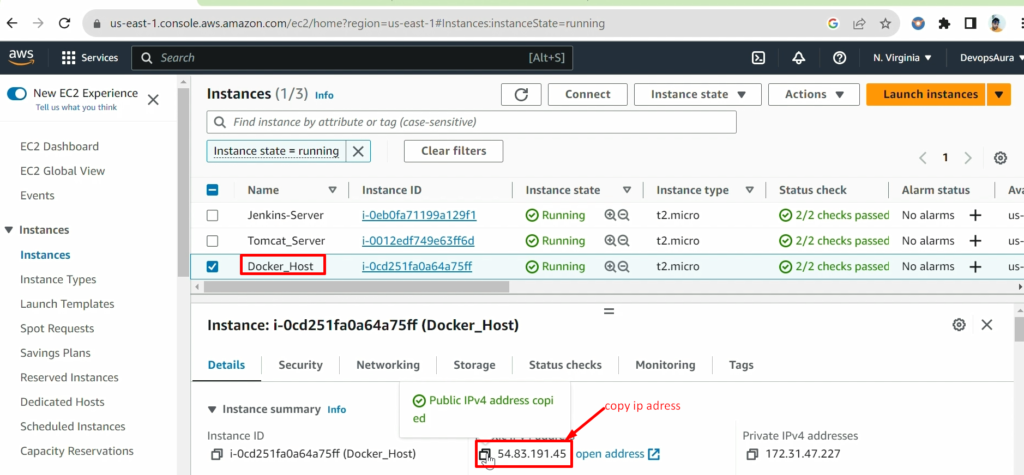
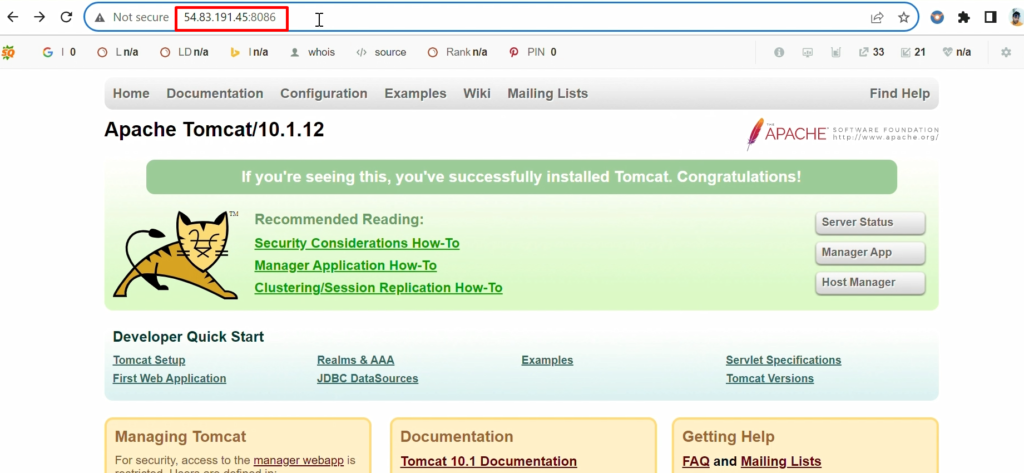
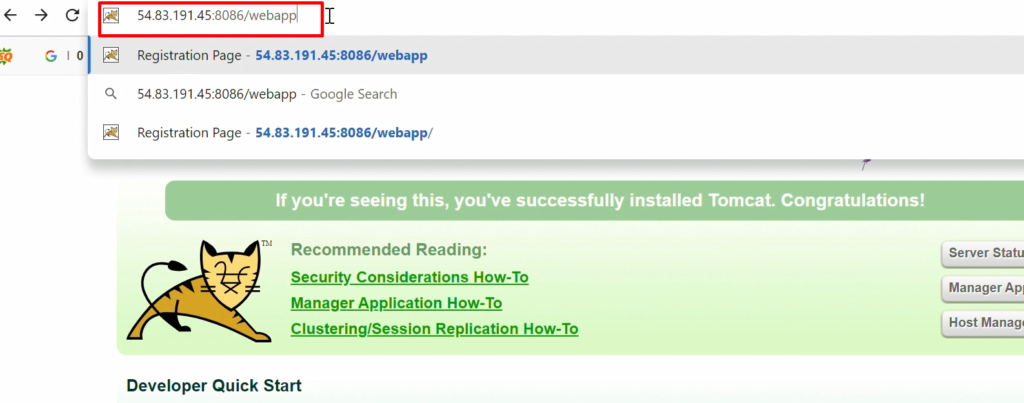
Now, we will try to access our application “webapps” on the container. For this, we need to add “/webaap’ in the URL like below
Video Recording:-
Still you have any doubt in any steps, please go through this video again
Automate build and deployment on the Docker container
- In the previous Step, we executed the job that is BuildAndDeployOnContainer.
- With the help of this job, we were able to build our code and copy the artifacts onto their docker host.
- But from there, to create a container, we executed commands like a ‘docker build’ and ‘docker run’ manually.
- But that is not the right way to do that because we want to automate the end-to-end pipeline.
- I mean, once we commit our code onto GitHub, it should be able to build it and create an artifact and copy the artifact on the Docker host, creating your Docker image and creating a container from this.
- How we can do that one that is what we are going to see here.
- For that, we are going to update the existing job “BuildAndDeployOnContainer”